
XML files are essential in the WordPress ecosystem for various purposes, from importing content and configuring settings to managing sitemaps and integrating third-party services. Whether you’re a WordPress beginner or an experienced developer, understanding how to add XML files to your WordPress site is a valuable skill. This guide will walk you through the different methods to upload and manage XML files in WordPress, ensuring you can handle any scenario that comes your way.

Quick Links
How to Add an XML File to WordPress
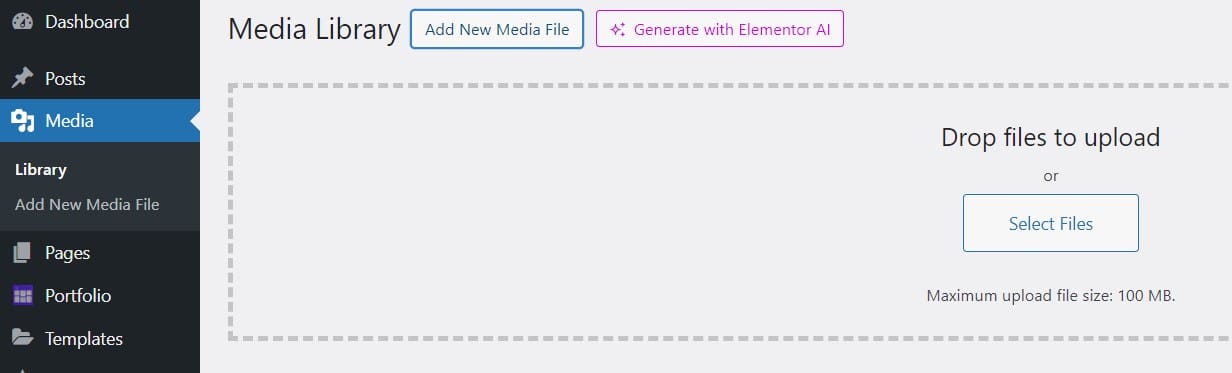
1. Adding XML Files to Your Media Library
If the .xml file is something like a sitemap or a static file that needs to be publicly accessible, you can upload it to your Media Library.
Steps:
- Login to WordPress Admin:
- Go to your WordPress dashboard by visiting yourdomain.com/wp-admin.
- Access the Media Library:
- In the sidebar, click on Media >> Add New.
- Upload the XML File:
- Drag and drop your .xml file into the upload area or click the Select Files button to browse and upload.
- Get the URL of the Uploaded XML File:
- Once uploaded, click on the file in the Media Library to view its details. Copy the file URL, which you can then use as needed.
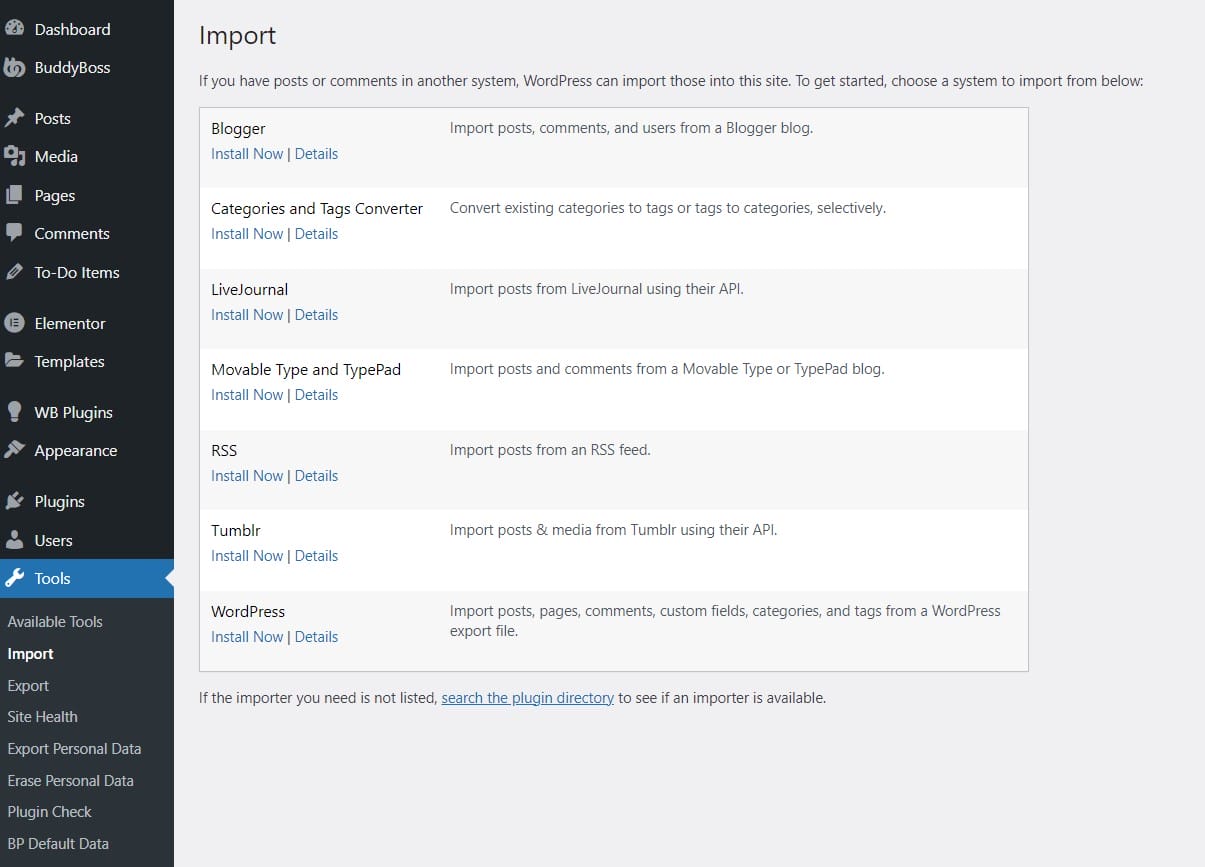
2. Using the WordPress Importer
If you’re importing content into your WordPress site, such as posts, pages, or custom post types, WordPress has a built-in importer that can handle .xml files.
Steps:
- Login to WordPress Admin:
- Go to your WordPress dashboard.
- Navigate to Import:
- In the sidebar, go to Tools >> Import.
- Install WordPress Importer Plugin:
- If you haven’t installed the WordPress Importer plugin, you’ll be prompted to do so. Click Install Now under WordPress and then Run Importer.
- Upload the XML File:
- Use the browse button to find your .xml file, then click Upload file and import.
- Assign Content:
- You’ll be asked to assign the content to an existing user or create a new user. You can also choose to download and import file attachments.
- Complete the Import:
- Click Submit to complete the import process.
3. Manually Uploading XML Files via FTP

For more advanced users, you can manually upload .xml files to your WordPress site using an FTP client.
Steps:
- Connect to Your Website via FTP:
- Use an FTP client (like FileZilla) to connect to your website’s server. You’ll need your FTP credentials (host, username, password).
- Navigate to the Desired Directory:
- Once connected, navigate to the directory where you want to upload the .xml file. This could be within your theme folder, the root directory, or a custom folder.
- Upload the XML File:
- Drag and drop your .xml file from your computer into the chosen directory on the server.
- Verify the Upload:
- Once uploaded, you can verify by accessing the file via its direct URL (e.g., yourdomain.com/wp-content/uploads/yourfile.xml).
4. Adding XML Files for Plugin Configuration
Certain plugins may require you to import .xml files to configure settings or import data.
Steps:
- Plugin-Specific Instructions:
- Each plugin will have its own methods for handling .xml files. Refer to the plugin’s documentation or settings area for specific instructions.
- Use Plugin’s Import Feature:
- Typically, there will be an Import or Upload option within the plugin’s settings, where you can upload your .xml file directly.
Final Thoughts
Managing XML files in WordPress is straightforward once you know the correct method for your specific needs. Whether you’re uploading a file for public access, importing content, or configuring a plugin, WordPress offers flexible solutions to handle XML files. By following the steps outlined in this guide, you’ll be well-equipped to add XML files to your WordPress site efficiently and effectively. Understanding these processes not only enhances your website’s functionality but also empowers you to take full control of your WordPress environment.
Interesting Reads:
How To Access Archive Pages In WordPress

