
The landscape of education is rapidly evolving and at the forefront of this transformation are Learning Management Systems (LMS) like LearnDash, which equip instructors with a powerful platform to manage and deliver online courses. We aim to shed light on features offered by the LearnDash Dashboard that can be harnessed by instructors to enhance their teaching capabilities. We will explore everything from the creation of courses on the frontend to the facilitation of direct communication between students and teachers.
The LearnDash Dashboard plugin offers instructors a dedicated platform to manage courses, track learner progress, and enhance communication with students. Its intuitive features and customizable settings, instructors can create dynamic and interactive learning experiences that cater to the unique needs of their students.

Quick Links
LearnDash Dashboard
LearnDash Dashboard is a complete and user-friendly eLearning solution for instructors and students. It includes a frontend course builder, dedicated dashboards, detailed reports, quiz tracking, assignment management, Zoom integration, advanced analytics, and instructor showcasing.
This plugin provides four different types of dashboard views:
1. Admin View
2. Instructor View
3. Group Leader View
4. Student View
In this blog, we are gonna discuss the full potential of Learndash Dashboard for Instructors.
Required Plugins:
2. Woo-commerce
3. LearnDash Woo-commerce Integration
4. BuddyPress
Features of LearnDash Dashboard for the Instructors
1. Dashboard
1. Dashboard Tiles: The Dashboard page displays comprehensive statistics including total courses, topics, essays, and more.
2. Featured Course: You have the option to showcase a selected course as featured, if desired.
3. My Earnings : Your earnings graph is prominently displayed, offering insights across various timeframes such as yearly, last month, current month, and the past 7 days.
4. Course Completion: A pie chart visualizes course completion progress, allowing you to select different courses to view specific completion metrics.
5. Time spent On a course: This section offers insights into individual time spent on various courses, aiding in monitoring learner engagement and progress.
6. Top courses: Displaying a bar graph, this section illustrates the popularity of courses over different time frames, including the year, last month, current month, and the past 7 days.
7. Student Details: This section presents student details through three pie charts:
1. Course Progress: The first chart depicts course progress, showcasing completed, not started, and in-progress statuses.
2. Assignment Status: The second chart displays assignment details, including approved, unapproved, and pending statuses.
3. Quiz Completion: The third chart illustrates quiz completion status, distinguishing between completed and incomplete quizzes.
With each selection you can also see students course completion in each course.
2. Profile
1. My profile: This section contains the details of the instructor such as registration, date, first name, e-mail, bio, etc.
2. Edit Profile: This provides a link to settings to edit some details of your profile.
3. Courses
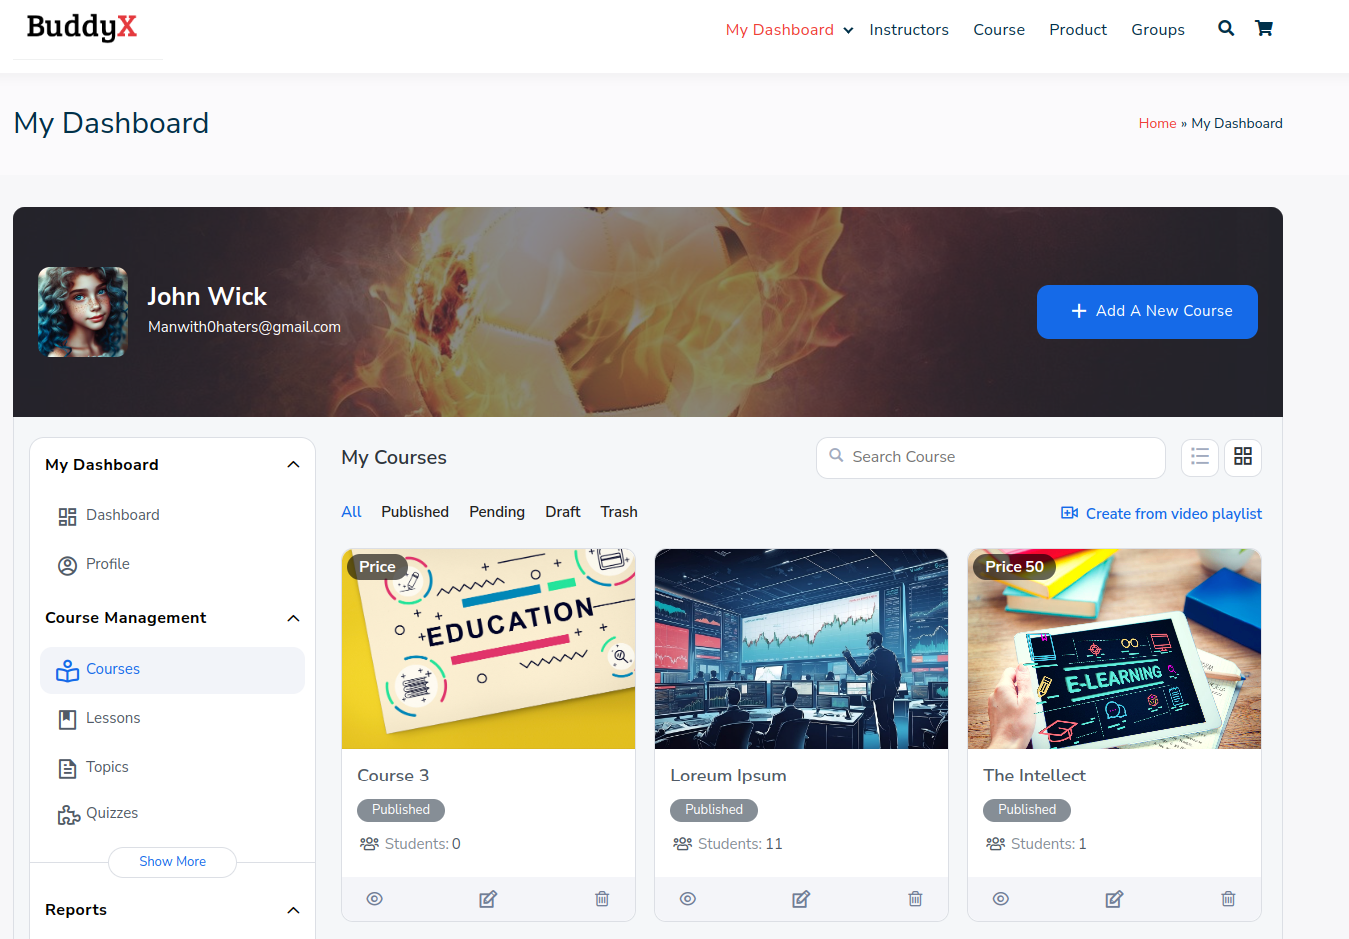
This section displays the comprehensive list of courses available for creation, viewing, editing, and deletion.
1. Creating a course
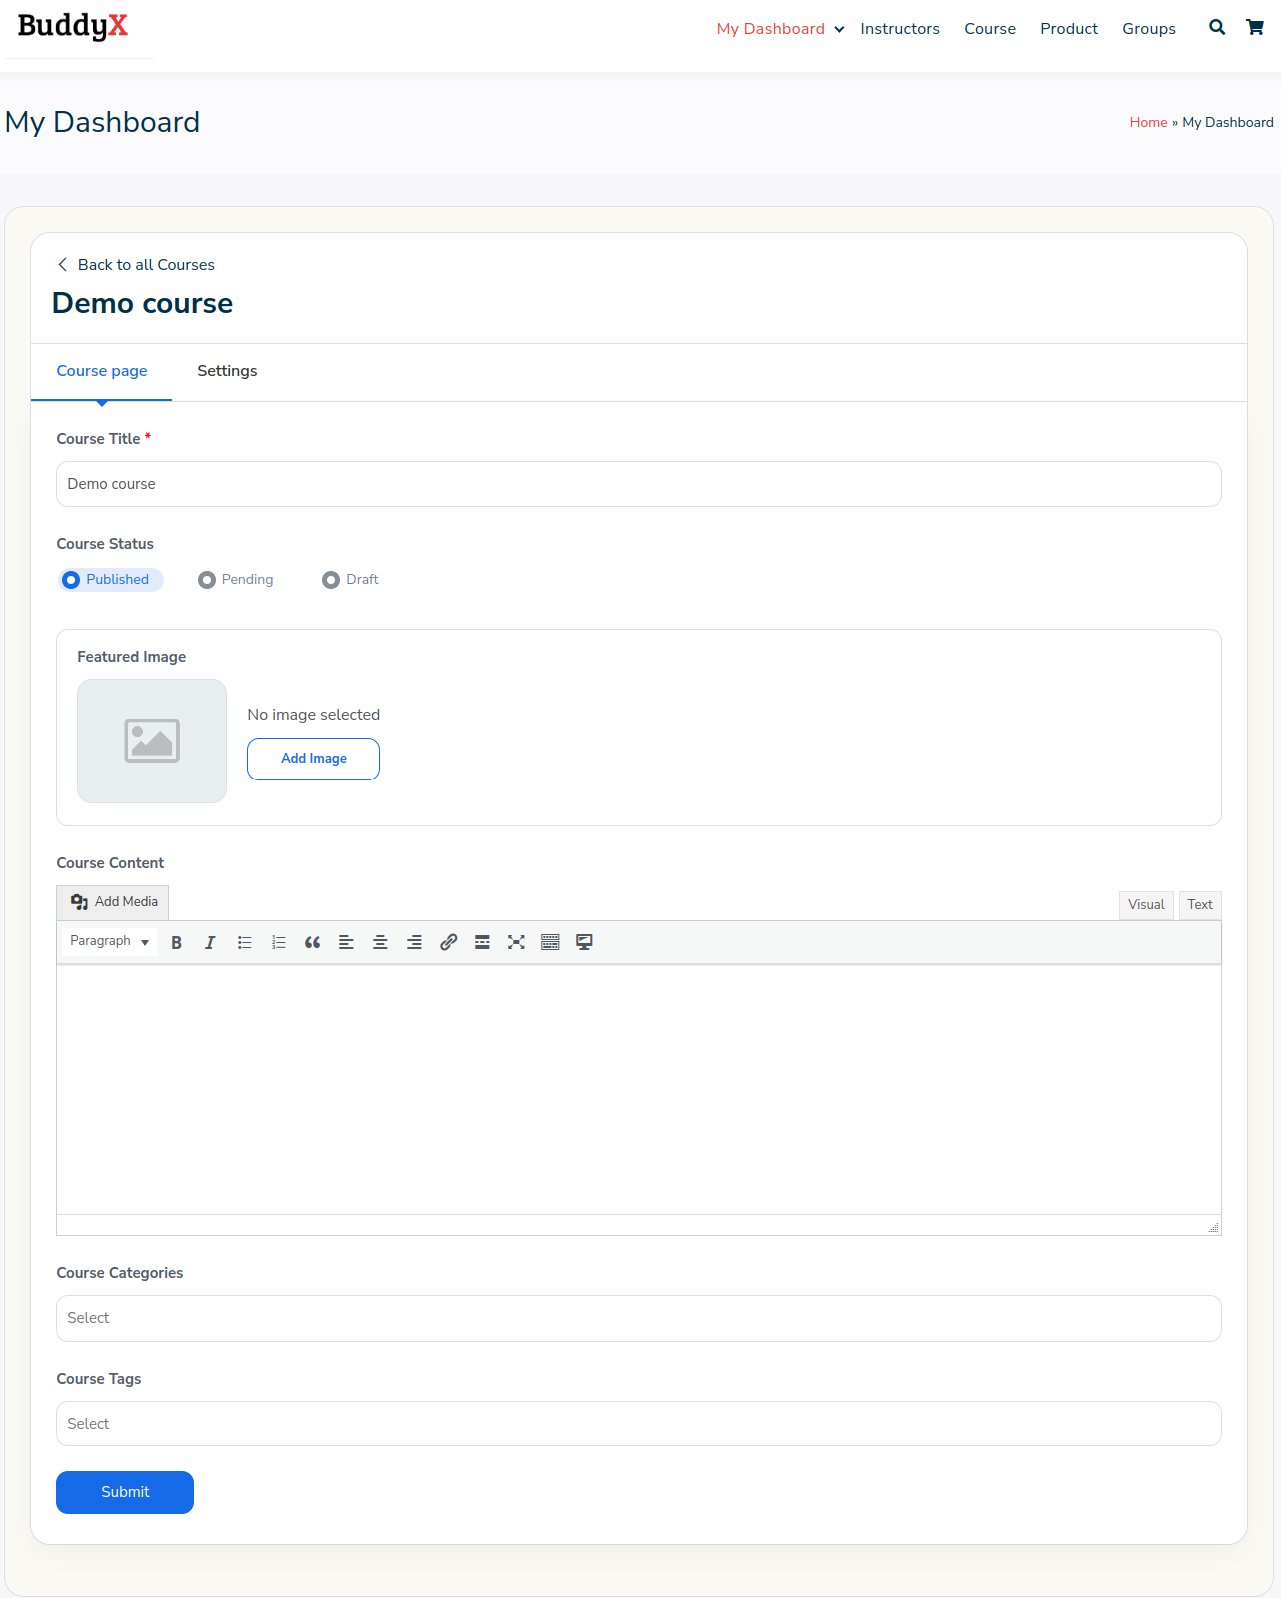 This section allows Instructors to manage your courses comprehensively. You can add a title, select the course status, incorporate features such as images and course content, and choose from a variety of course categories and tags.
Upon clicking “submit,” the Course Builder section is automatically generated.
2. Course Builder
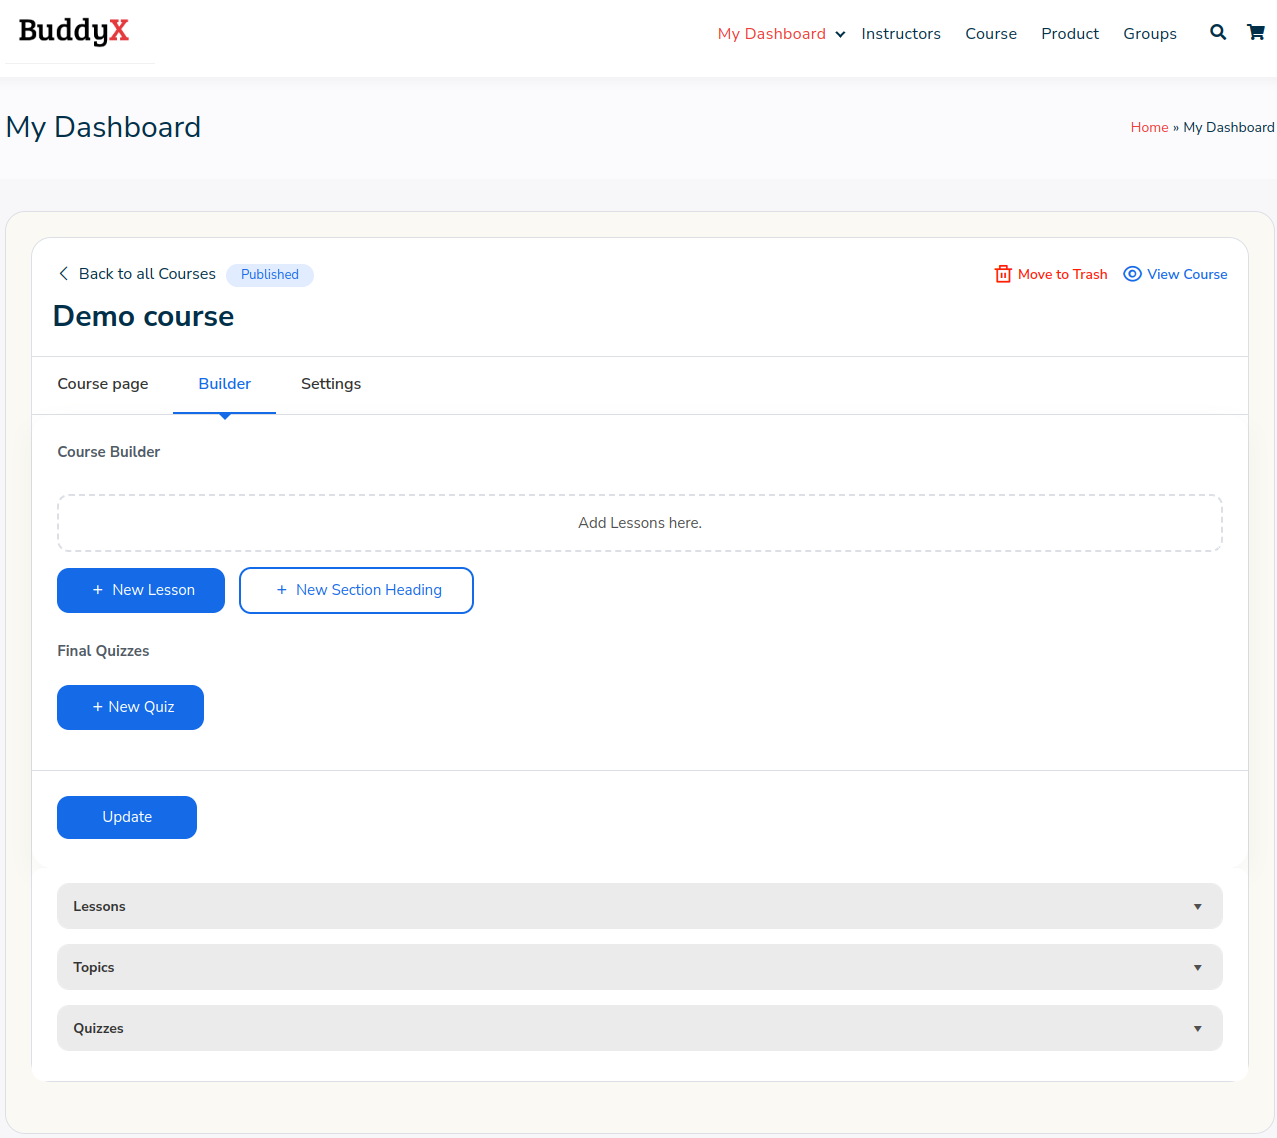
Within this section, you have the ability to add a new lesson or select from existing ones. Within each lesson, topics and quizzes can be included, either by adding new ones or selecting from previously created ones.
3. Settings
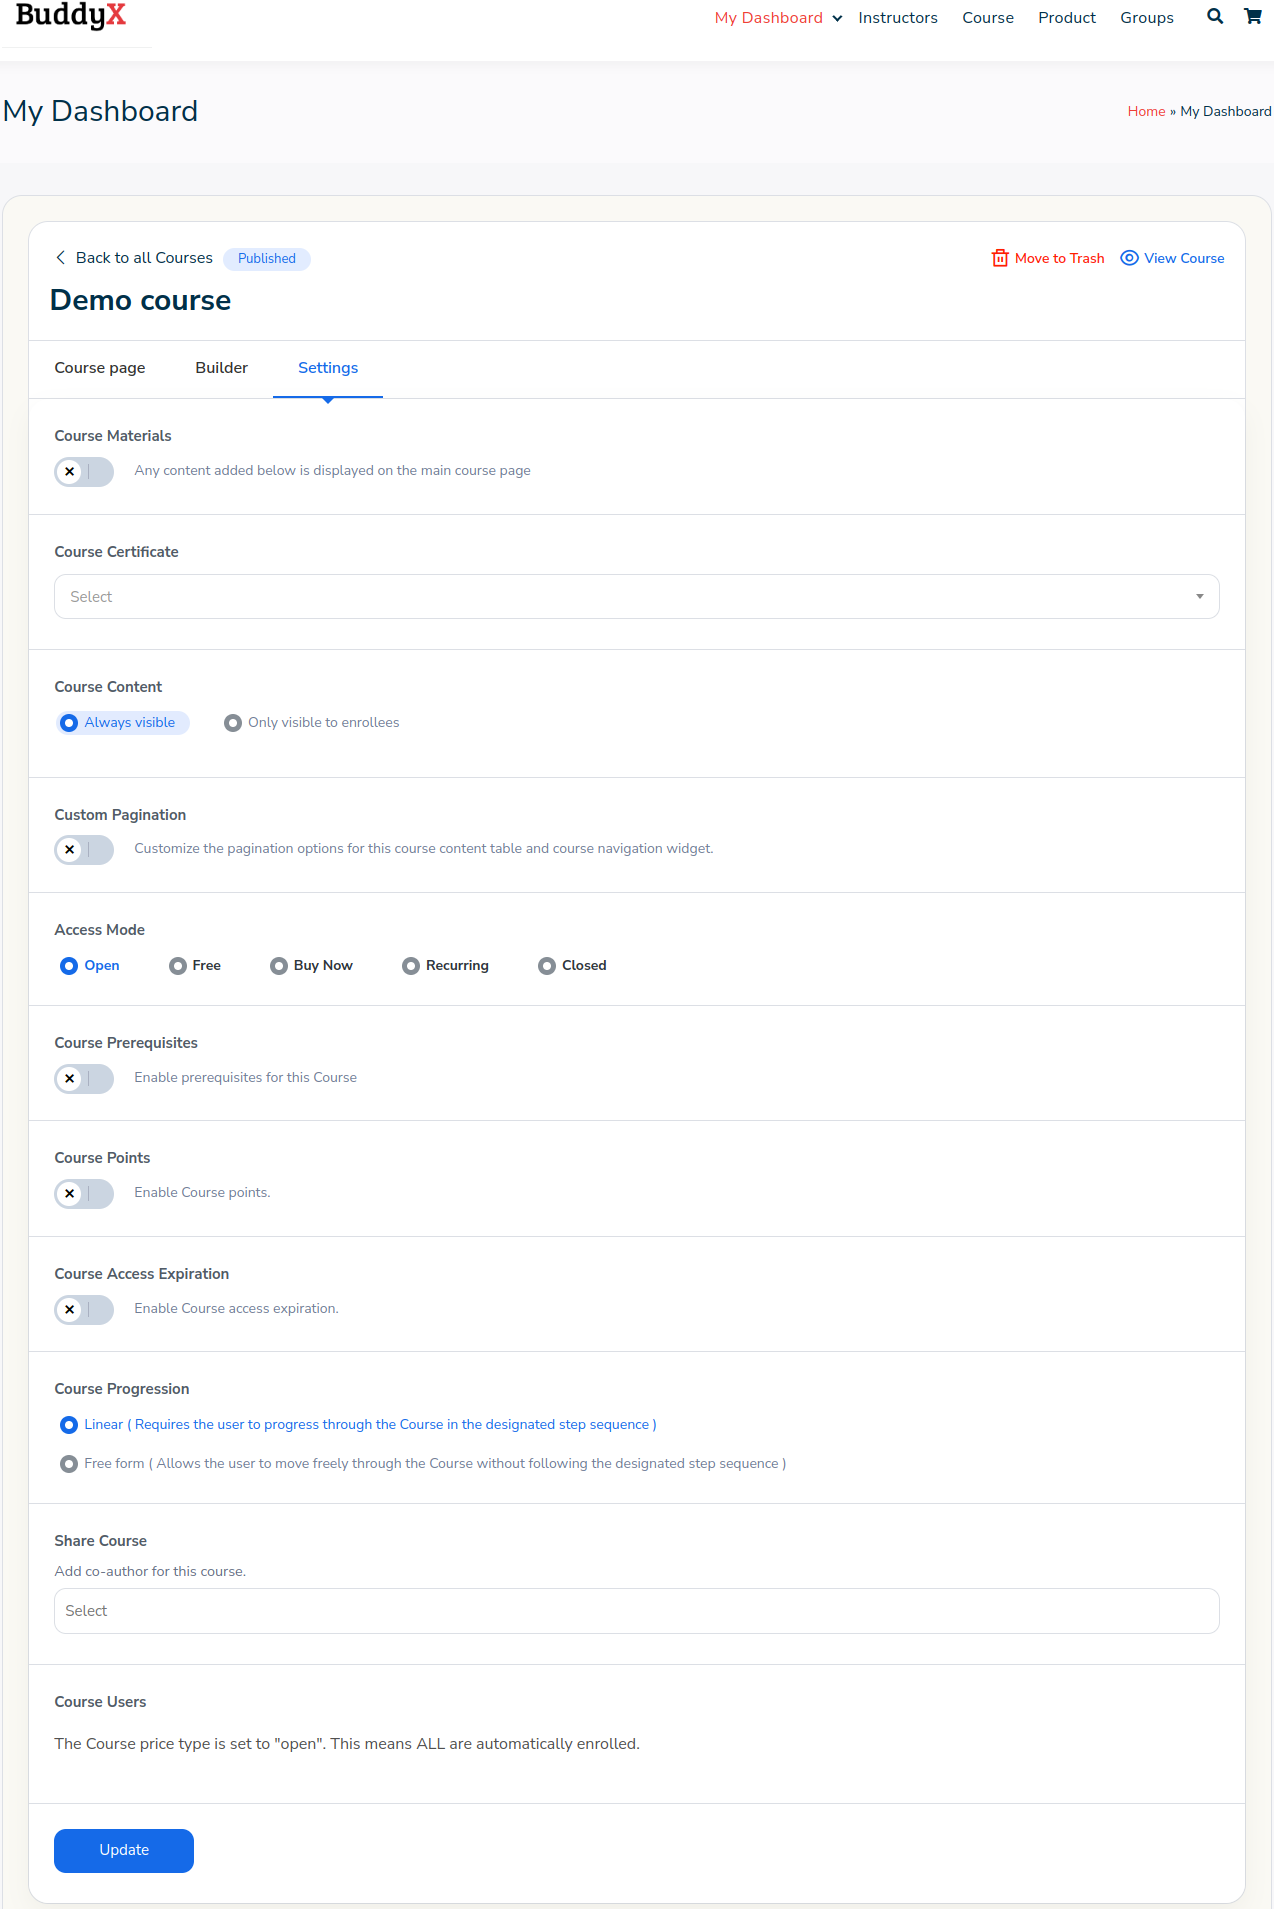
1. Course Materials
To enhance the interactivity of the course, you can include images, PDF documents, and videos
2. Course Certificate
Select a course certificate that can be awarded upon completion of the course.
3. Course Content
Decide whether the course content should be always visible or only visible to enrollees.
4. Custom Pagination
Implement Custom Pagination to separate the lessons and topics into distinct pages, making the course less daunting.
5. Access Mode
When creating your courses, you have the flexibility to choose from various access modes to suit your needs. The “Open” mode allows unrestricted access to the course content for all users. “Free” mode enables users to enroll in the course without any cost. “Buy Now” mode requires users to make a one-time payment to access the course. In “Recurring” mode, users subscribe to the course with a recurring payment plan. Finally, “Closed” mode restricts access to only those who have been specifically enrolled or invited to the course. These diverse access modes cater to different preferences and business models, offering flexibility in how courses are accessed and monetized.
Woo-Commerce Integration
To sell your course as a product, you can utilize the Learndash WooCommerce Integration. Follow these steps to set it up seamlessly.
1. Choose to set the course as closed.
2. Assign a Course Price to the course and save the changes. This action will automatically generate a Product for the course, using the course data. This simplifies the process of creating a course product compared to the traditional method.

5. Course Prerequisites
You have the option to establish course prerequisites for an advanced course.
6. Course Points
You can awards point for course completion and these points can be used to unlock other courses.
7. Course Access Expiration
You can configure the course access expiration date and opt to delete the data once that date is reached.
8. Course Progression
You have the flexibility to select either the content drip method or allow free-form access to the course.
9. Share Course
You have the ability to add co-authors to your course, enabling multiple instructors to contribute, thus embodying the concept of a multi-instructor course.
4. Lessons
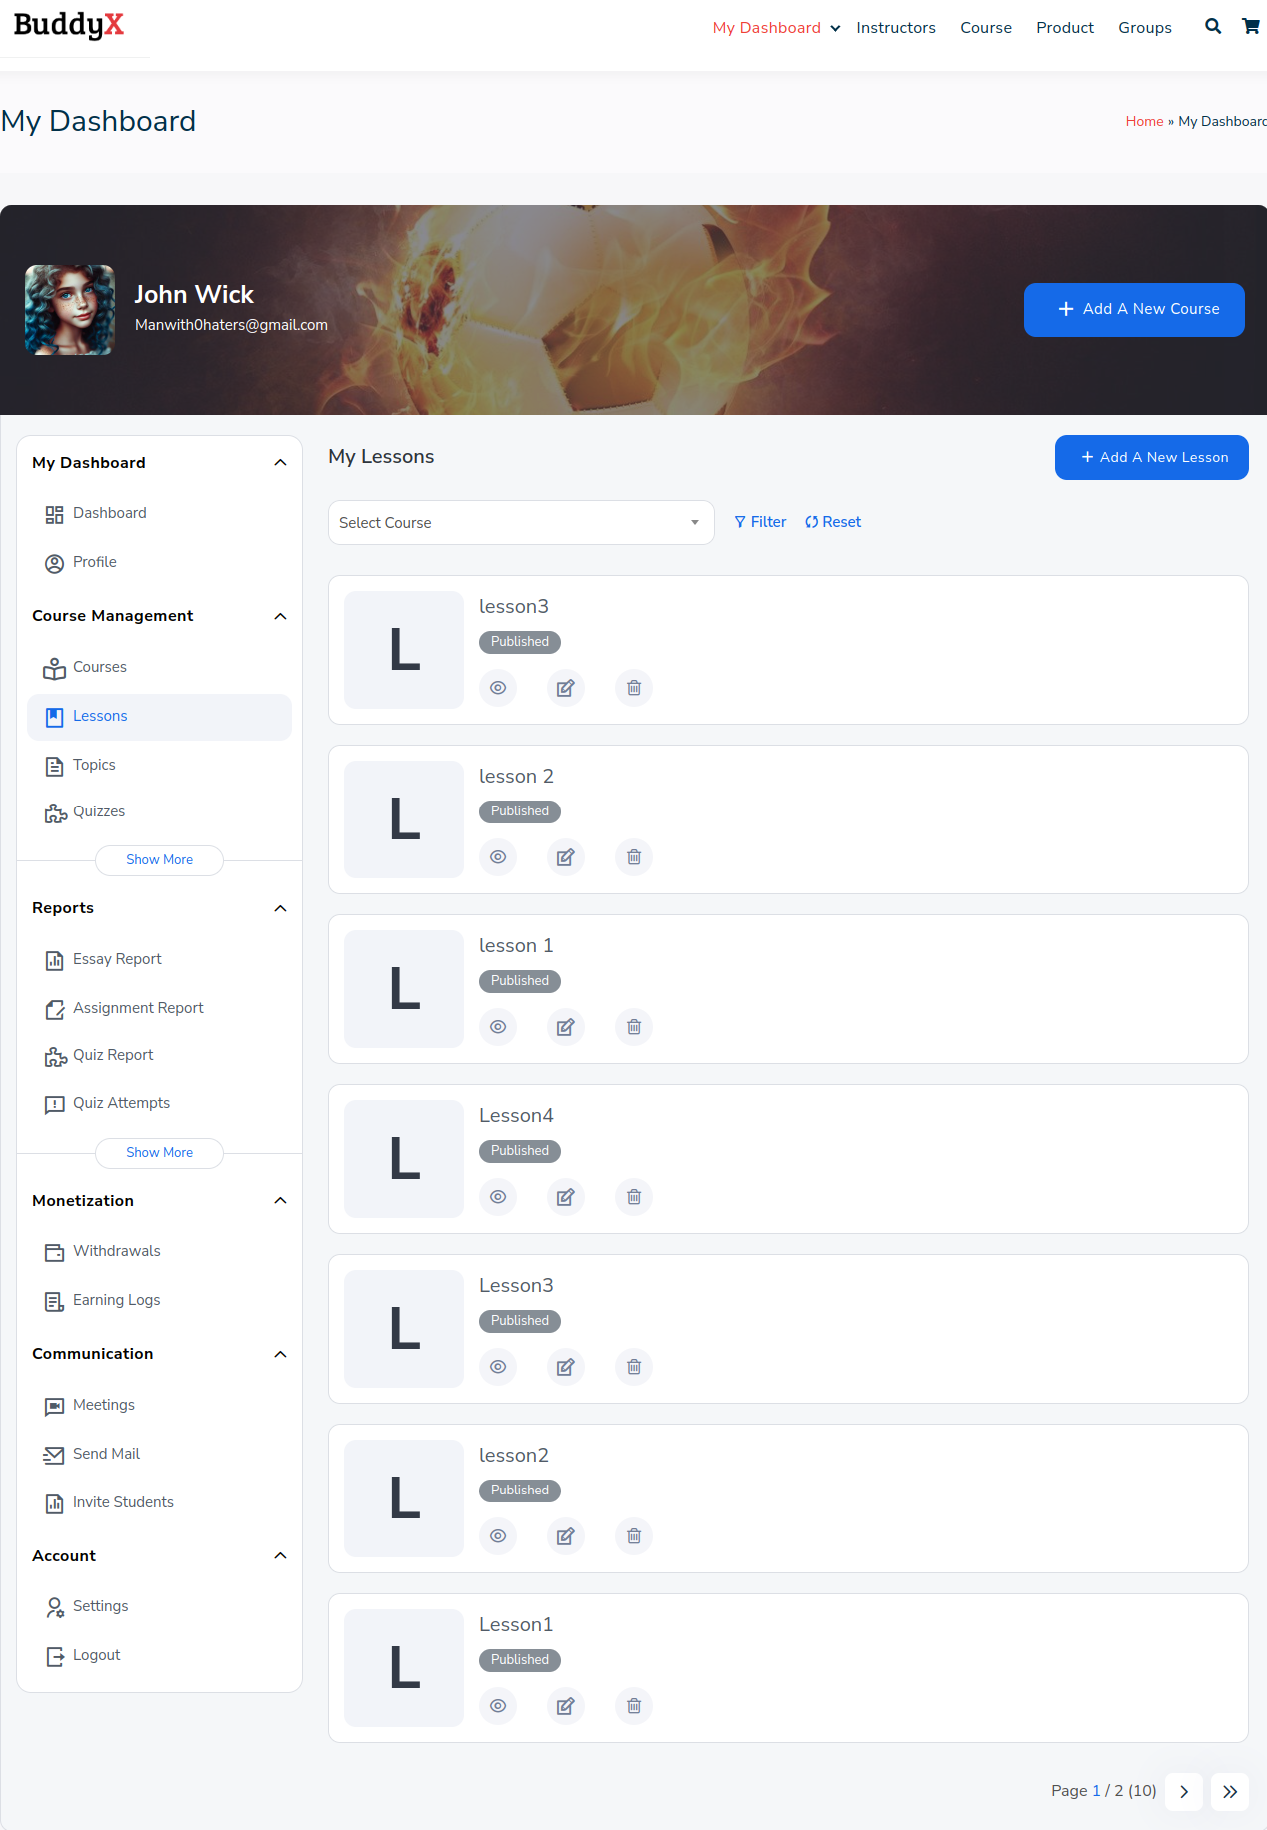
Instructors have the ability to delete, edit, or create lessons within this section.
You have the option to attach videos, images, PDFs, and assignments to the lessons. Additionally, you can associate the lesson with any course of your choice.
You also have the capability to schedule a forced timer, and upon its completion, the lesson can be marked as completed after that time period only.
5. Topics

Within this section, you have the freedom to edit, delete, and create topics. These topics can then be associated with specific lessons, allowing for structured organization and seamless navigation of course content.
6. Announcements
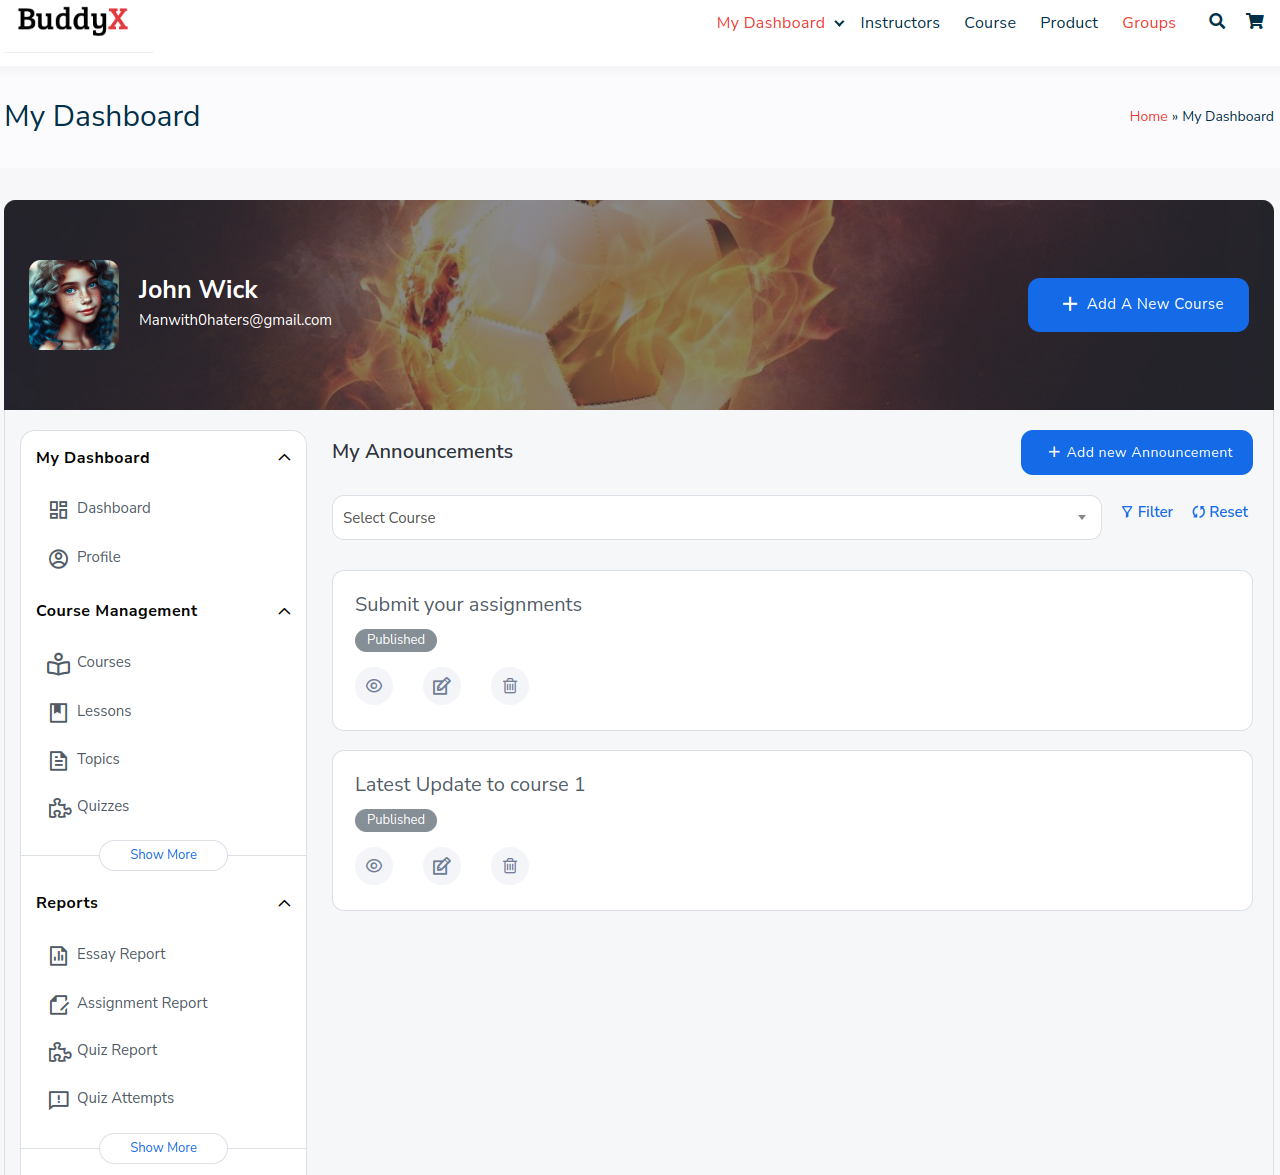
In this section, you’ll find an option to create announcements for students. These announcements can be related to various aspects of their learning journey, such as course updates, essay prompts, assignment deadlines, and more.
7. Reports
1. Essay Reports

This tab shows the student’s submitted essay data based on the selected course and lessons.
It Provides four different filters:
i) Course
ii) Lesson/Topics
iii) Quizzes
iv) Essay Status
“Click the ‘Approve’ button to approve the essay or access a detailed view of the content and award approval from the ‘View More’ popup.”
2. Assignment Report
This tab displays the student’s assignment data filtered by the selected course and lessons, offering three different filters:
i) Course
ii) Lesson/Topics
iii) Assignment Status.
Clicking ‘View More’ provides access to a detailed report of the assignment.

3. Quiz Reports

This tab shows the quiz data performed by students. It lists all the student who has performed the quiz you have selected in the filter.
You can also download the .csv file for a detailed report.
4. Quiz Attempt
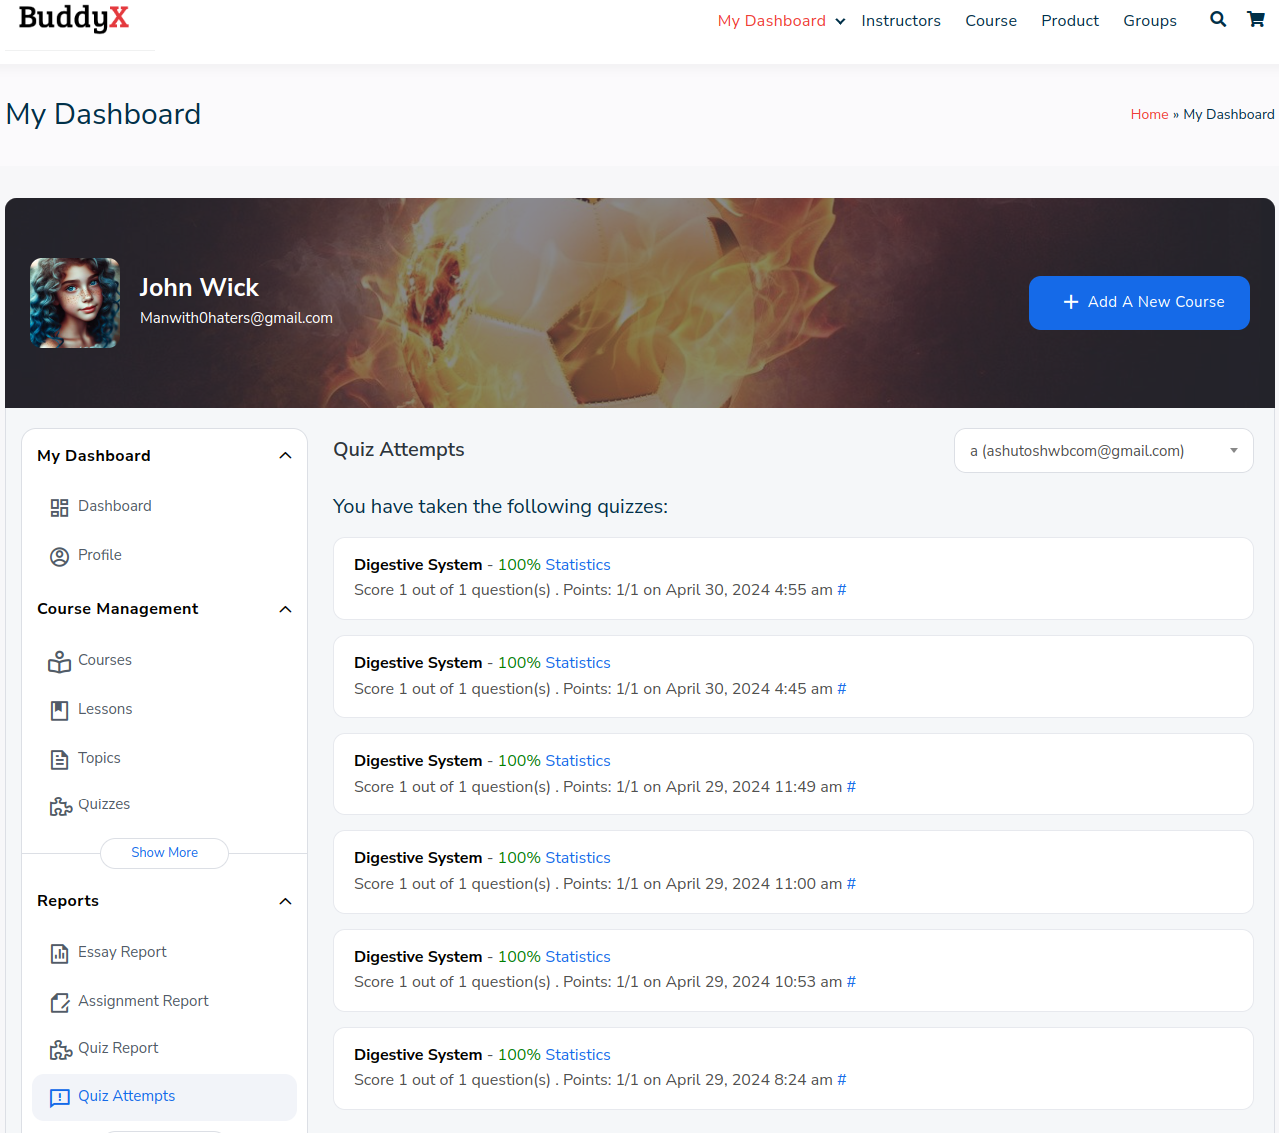
Have a complete track of your students (students who are enrolled in your courses) quiz attempts right in your dashboard. This shows the quiz score obtained, the total score, the number of questions, and the passing grade, along with the quiz status. All of the data are shown in a tabulated manner to make everything easily accessible.
5. Submitted Essays
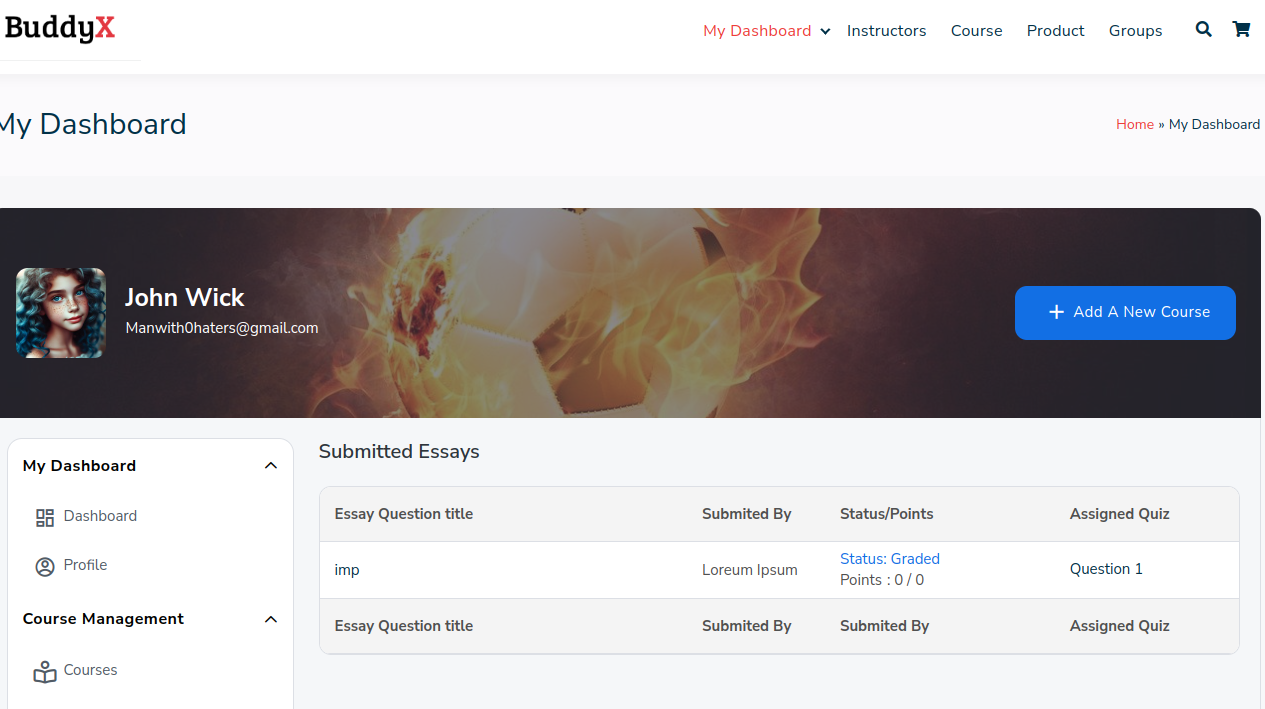
Instructors have the option to view the list of submitted essays under the report section, and can also approve them by awarding a point.
6. Course Reports
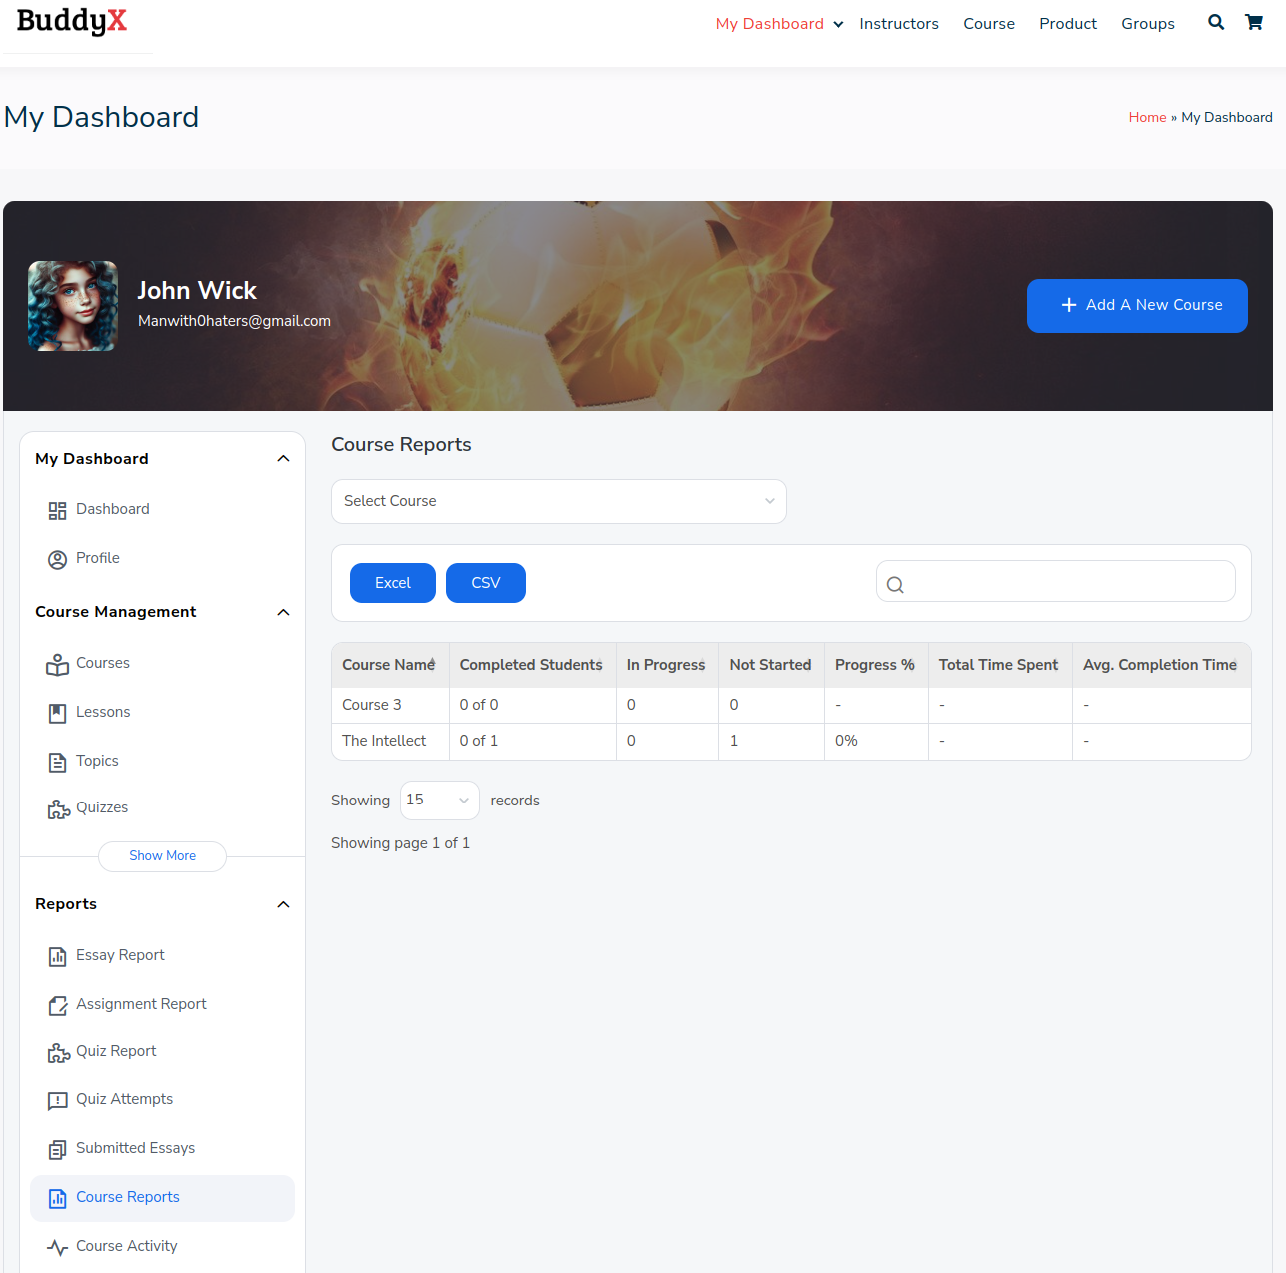
This Report Displays the data in two different ways:
i) All Course Data
ii) Individual Course Data
It provides course name, completed students, in progress, not started, progress percentage, total time spent, and average completion time.
This data helps instructors track the progress of students within the course, identify areas where students may be struggling, monitor overall course completion rates, and assess the effectiveness of their teaching methods.
7. Course Activity
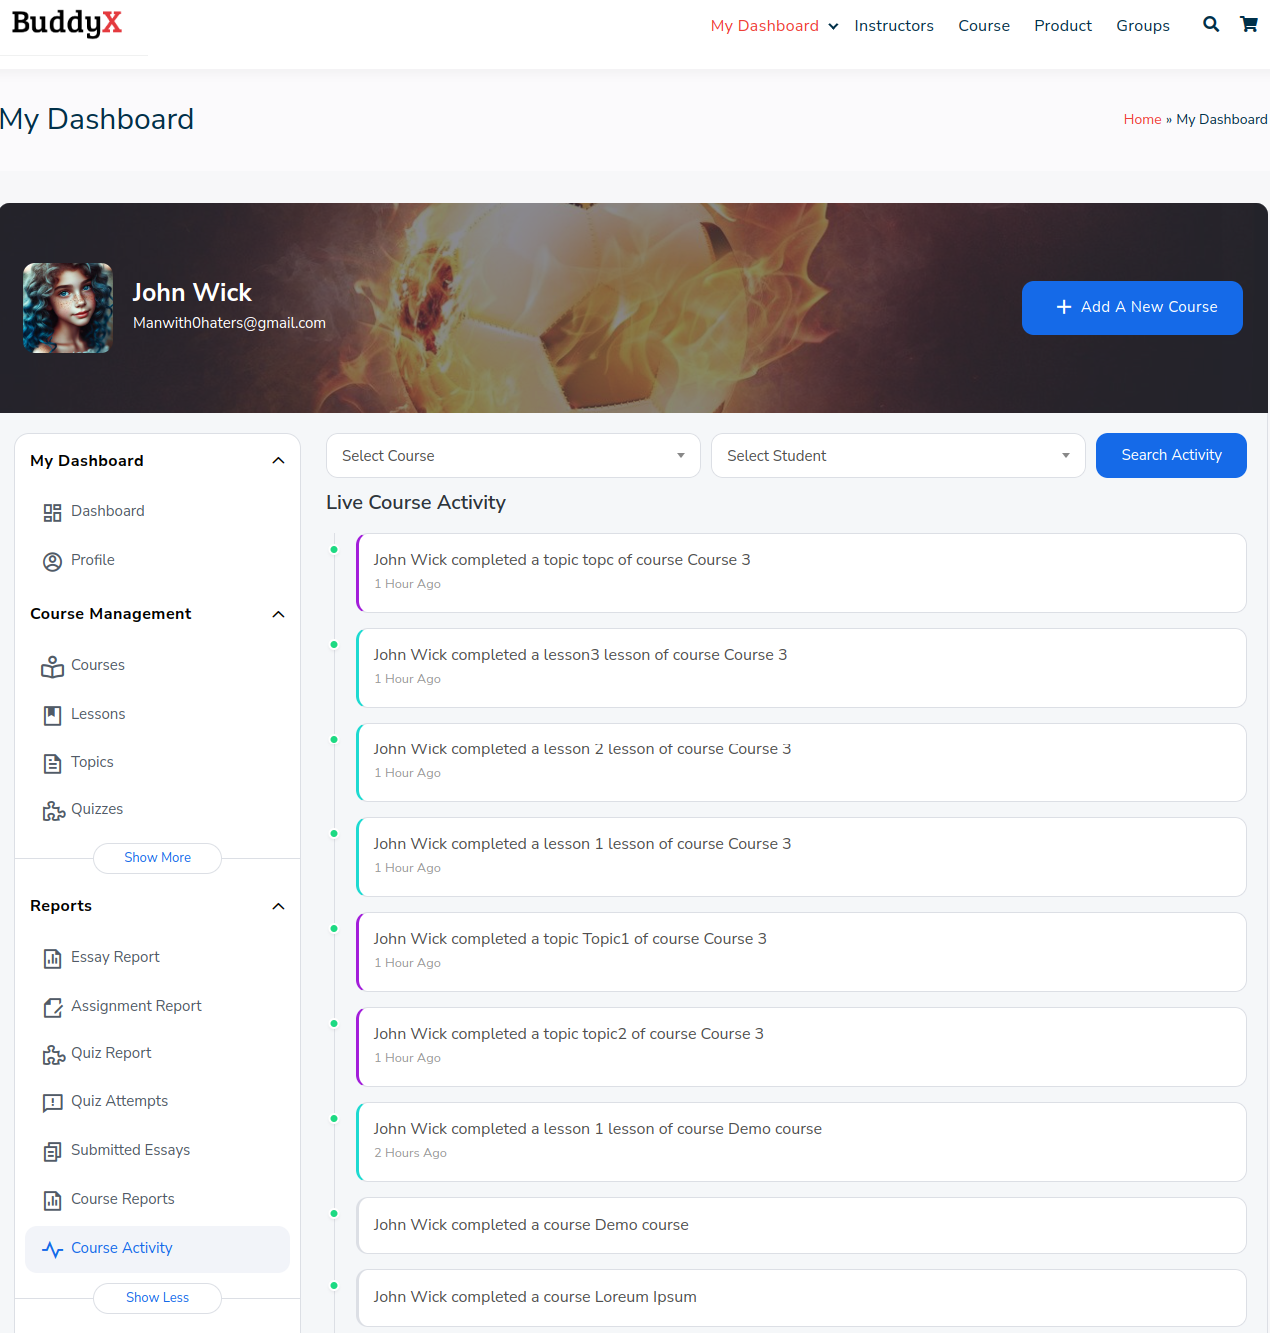
In this section, live activities such as user registrations for courses and student progress updates, including course completions, lesson and topic completions, as well as quiz and question submissions, are displayed in real-time. This dynamic overview allows instructors to stay informed about the engagement and progress of their students.
The filtering options enable them to focus on specific courses or individual student activities, facilitating targeted monitoring and intervention as needed.
8. Monetization
Instructors can easily request the withdrawal of their earnings through the “My Dashboard” page. By navigating to this section and selecting the “Withdrawal” option under the “Monetization” category, instructors gain access to a comprehensive overview of their total earnings and a list of previous withdrawal requests. This streamlined process empowers instructors to manage their finances efficiently and conveniently, ensuring a seamless experience.
9. Communication
1. Meetings
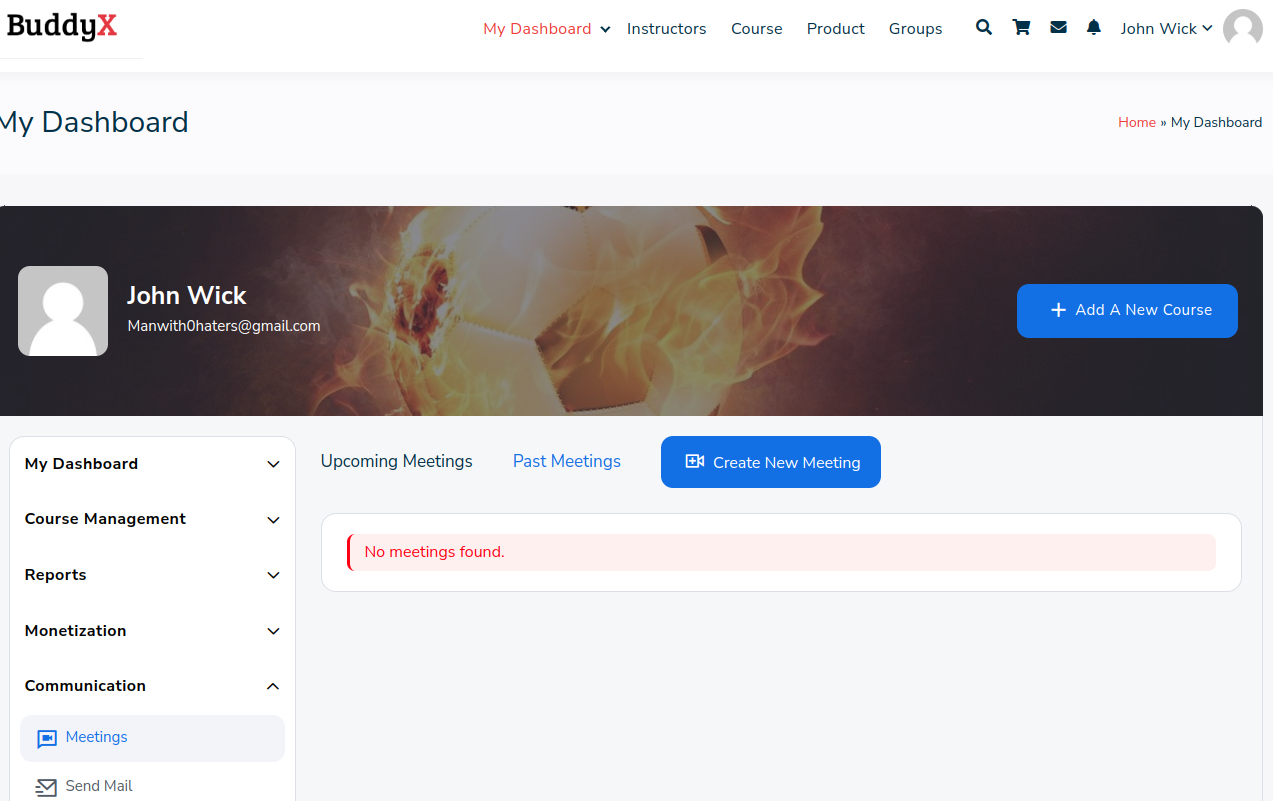
This section provides a comprehensive view of upcoming and past meetings, offering the capability to create new Zoom meetings seamlessly. This functionality enables Instructors to effectively host seminars, lessons, and various other events with ease and convenience.
2. Send Mail

Instructors have the capability to communicate with their students through email integration. This feature allows for various forms of communication, including sending alerts to students about upcoming deadlines or providing motivational quotes and daily messages. Instructors can also send emails to multiple students simultaneously.
This feature streamlines communication with students by allowing instructors to send targeted emails. By selecting a specific course, instructors can easily identify and message enrolled students. The flexibility to choose individual recipients or send to all simplifies customization. Writing a concise subject line provides clarity, while the message box allows for detailed communication. Clicking “Send” promptly delivers the email, fostering efficient and effective communication between instructors and students.
3. Private Message

It is used to send direct message using Buddypress, you can select one or multiple students. This feature enables instructors to send messages to students via messages. By selecting a specific course, instructors can easily identify and communicate with enrolled students. The option to choose individual recipients or send to all provides flexibility. Crafting a clear subject line ensures recipients understand the purpose of the message, while the message box allows for detailed communication.
4. Invite Students

This section is used to sent invites. An instructor can sent invites to new students or an existing student. Invites sent to existing student will automatically be excepted.
You can send at most 5 invites. It provide option to customize the subject or text of invitation.
At the end you select the course the invite is related to.
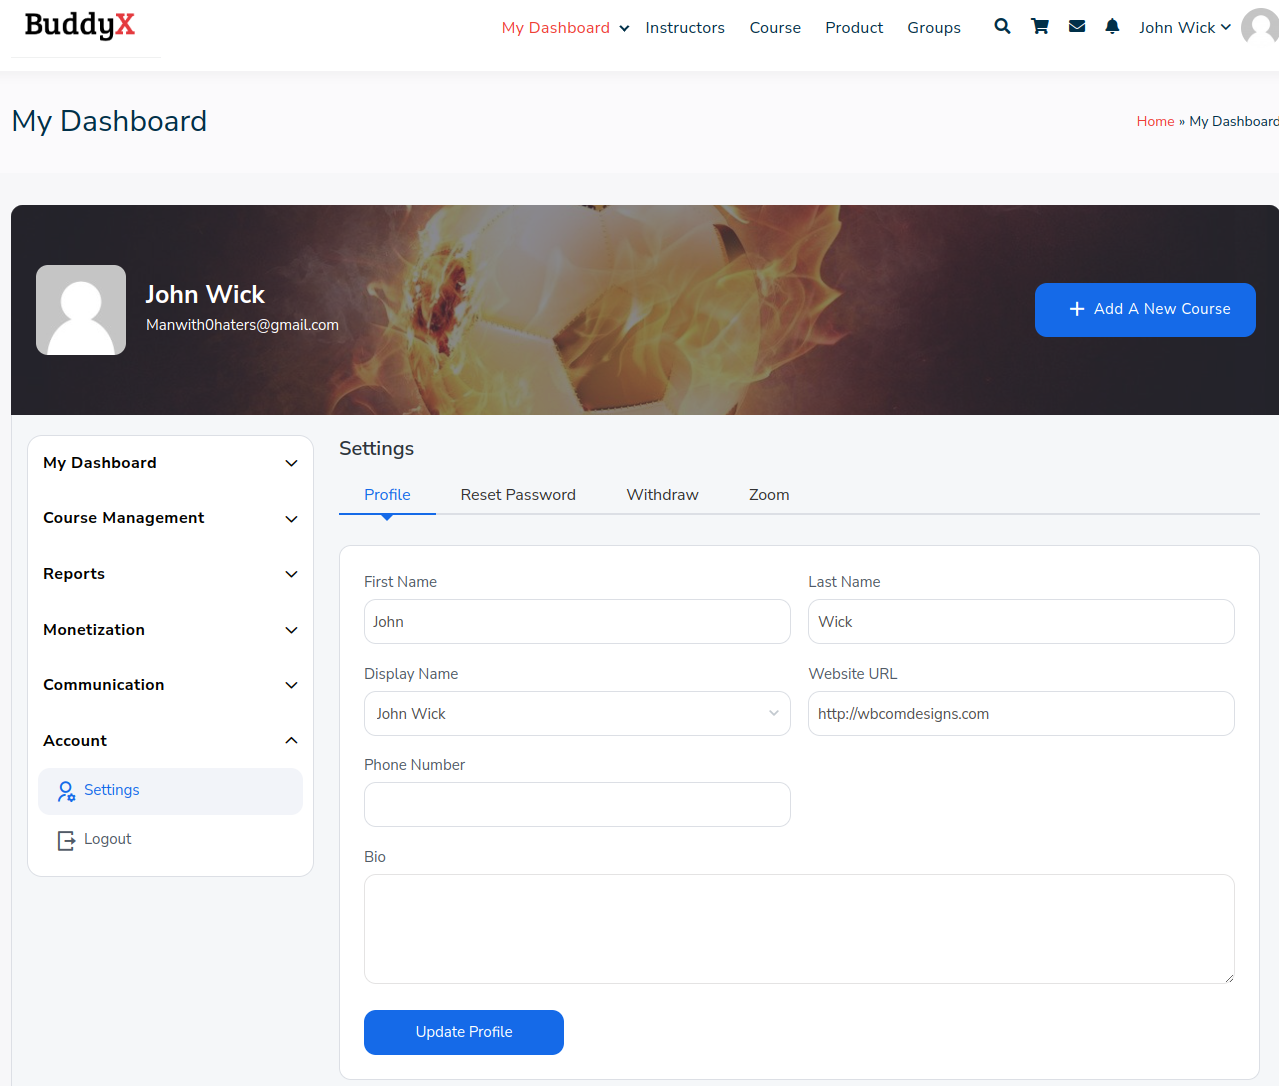
10. Account
1. Settings
i) Profile: In this section, you have the ability to configure your first name, last name, and display name. Additionally, you can include your website URL, phone number, and a brief bio to provide more information about yourself.
2. Reset password
Here you can reset your password.
3. Withdraw
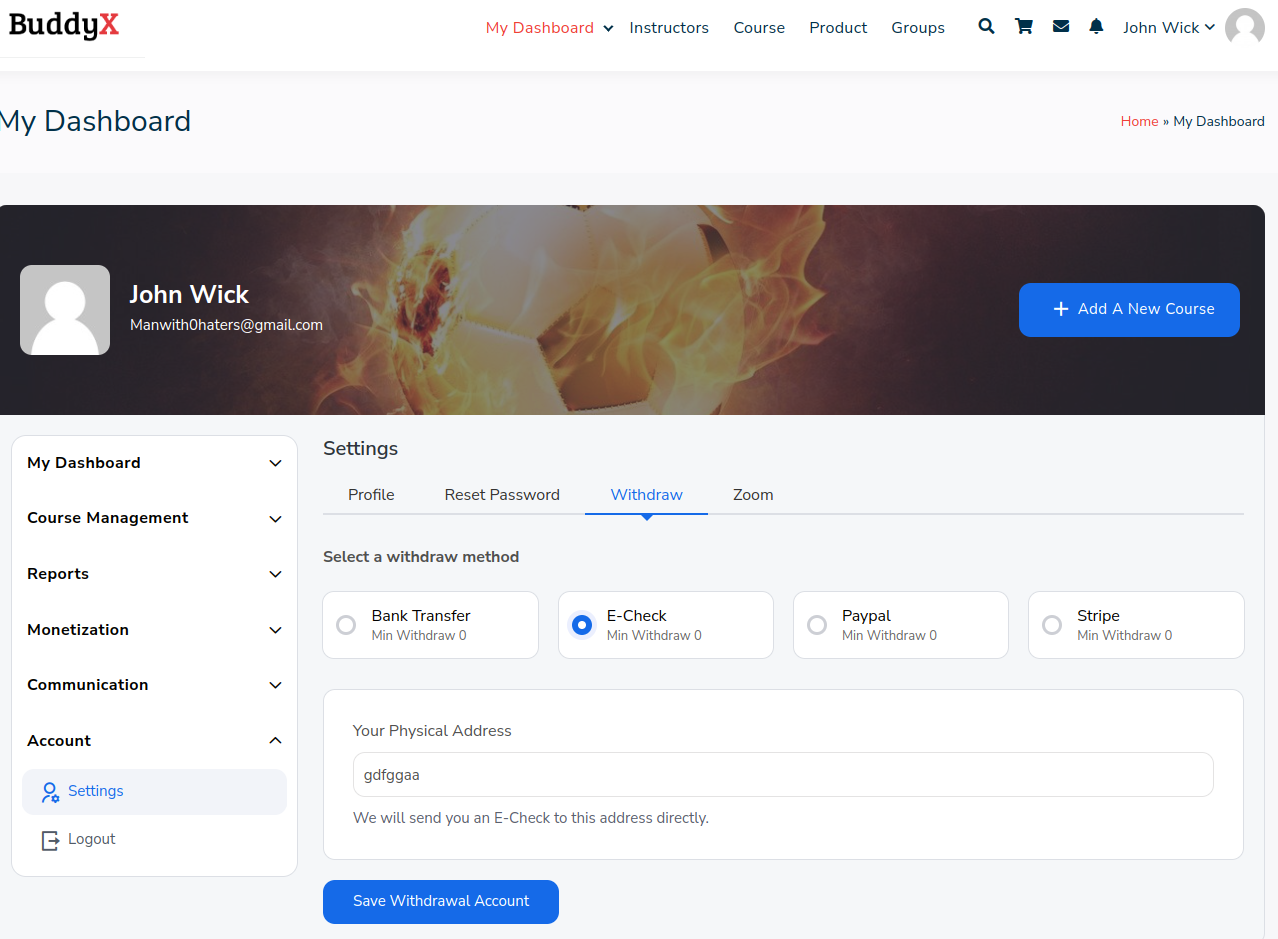
This provide option to withdraw the amount in you account. The instructor can set the method to withdraw their amount by navigating to withdraw preference link. Four types of methods are available:
i) Bank Transfer
ii) E-Check
iii) Paypal
iv) Stripe
4. Zoom

On this screen, site instructors can input their Zoom credentials.
Benefits of Using Learndash Dashboard as an Instructor
The Learndash Dashboard introduces an Instructor role, which proves advantageous for websites featuring multiple instructors. Becoming an instructor is straightforward, as individuals can register on the site, and the site admin holds the authority to appoint instructors from the backend. Instructors endowed with this role possess a spectrum of capabilities:
1. Course Sales Enablement: Instructors can market their courses for sale on the platform without going through a difficult road.
2. Course Creation & Management: Effortlessly create and oversee courses, ensuring smooth content and curriculum management.
3. Front-end Dashboard Control: Access to a user-friendly frontend dashboard streamlines management tasks, it is easy to use even for non-tech savvy.
4. Effective Student Communication: Facilitate seamless communication with students to offer guidance, updates, and support.
5. Earnings Withdrawal: Request and receive earnings through the platform.
6. Student Progress Tracking & Management: Tools provided enable instructors to monitor and manage student progress and performance.
7. Collaborative Teaching: Courses can be co-taught by multiple instructors if necessary, fostering collaboration.
8. Commission Setting for Instructors: Admin or instructors can establish commission rates based on agreements.
9. Automatic Commission Calculation: The system automates commission calculations, ensuring smooth financial transactions.
Conclusion
Our LearnDash Dashboard plugin boasts seamless integration with LearnDash, providing unparalleled benefits for instructors. With intuitive features and robust capabilities, instructors can effortlessly manage their courses, communicate effectively with students, and track progress with ease. What’s more, when paired with our BuddyX theme, the efficiency reaches new heights. The seamless integration between LearnDash Dashboard and BuddyX theme ensures a cohesive user experience, offering instructors a powerful toolkit to deliver exceptional online learning experiences. Together, LearnDash Dashboard and BuddyX theme form a winning combination, empowering instructors to thrive in the dynamic world of online education.
Interesting Reads:

