How to Rename BuddyPress Profile Nav Items


BuddyPress is a powerful plugin for WordPress that allows you to build a social network or community website with ease. One of its standout features is the user profile navigation menu, which provides seamless access to various sections of a user’s profile, such as activity streams, personal messages, and group memberships but sometimes the default labels of these navigation items might not perfectly fit the context of your website or the preferences of the users. Thus, how to rename BuddyPress profile is a crucial step in enhancing your community building experience..
So, to truly leverage its potential, personalization is essential. By tailoring various elements of your BuddyPress site, you can enhance user satisfaction, foster deeper connections, and encourage more active participation. Let’s learn How to Rename BuddyPress Profile Nav Items, to make your website more personalised.
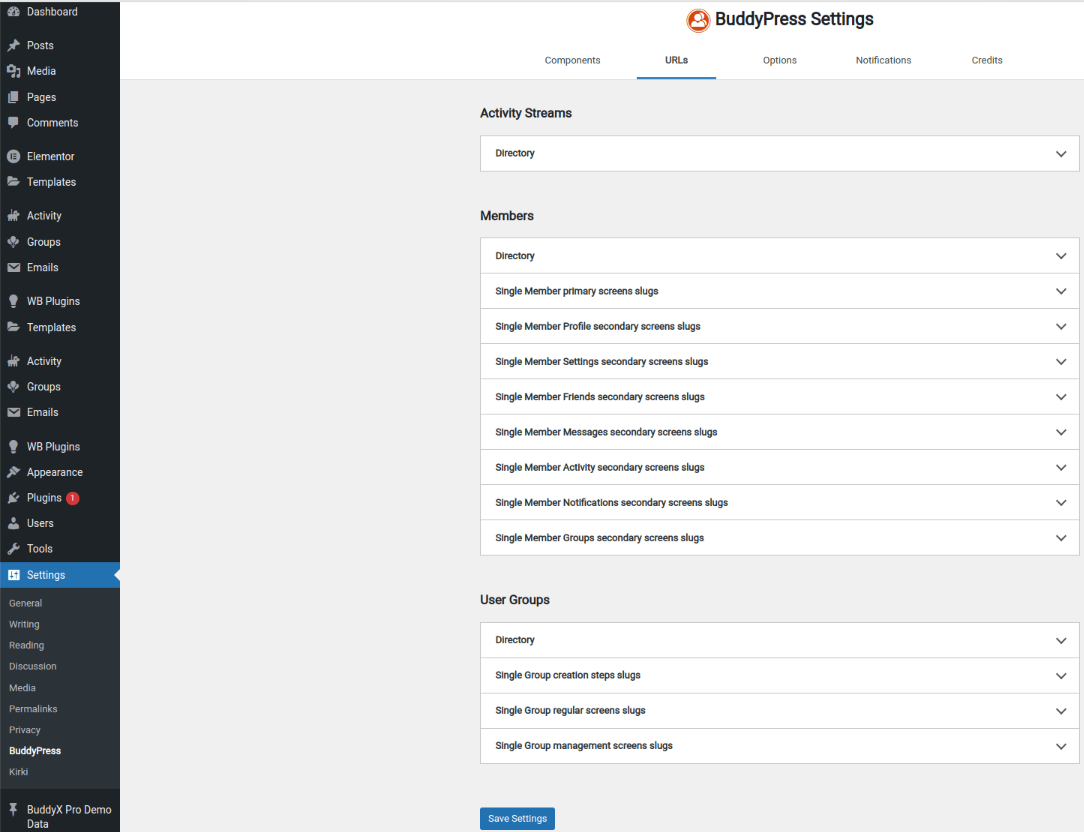
How to rename BuddyPress Profile URLs?
1. Open your WordPress Dashboard.
2. Navigate to Settings >> BuddyPress.
3. In BuddyPress, click on URLs and change the URL and slug of the profile you want to modify.
How to rename BuddyPress Profile Menu Items?
If you are using BuddyX Pro like us then, you can easily rename your menu items. Follow the below steps to rename your Buddypress profile menu items.
1. Open your site, click on customize.
2. Navigate to Menus.
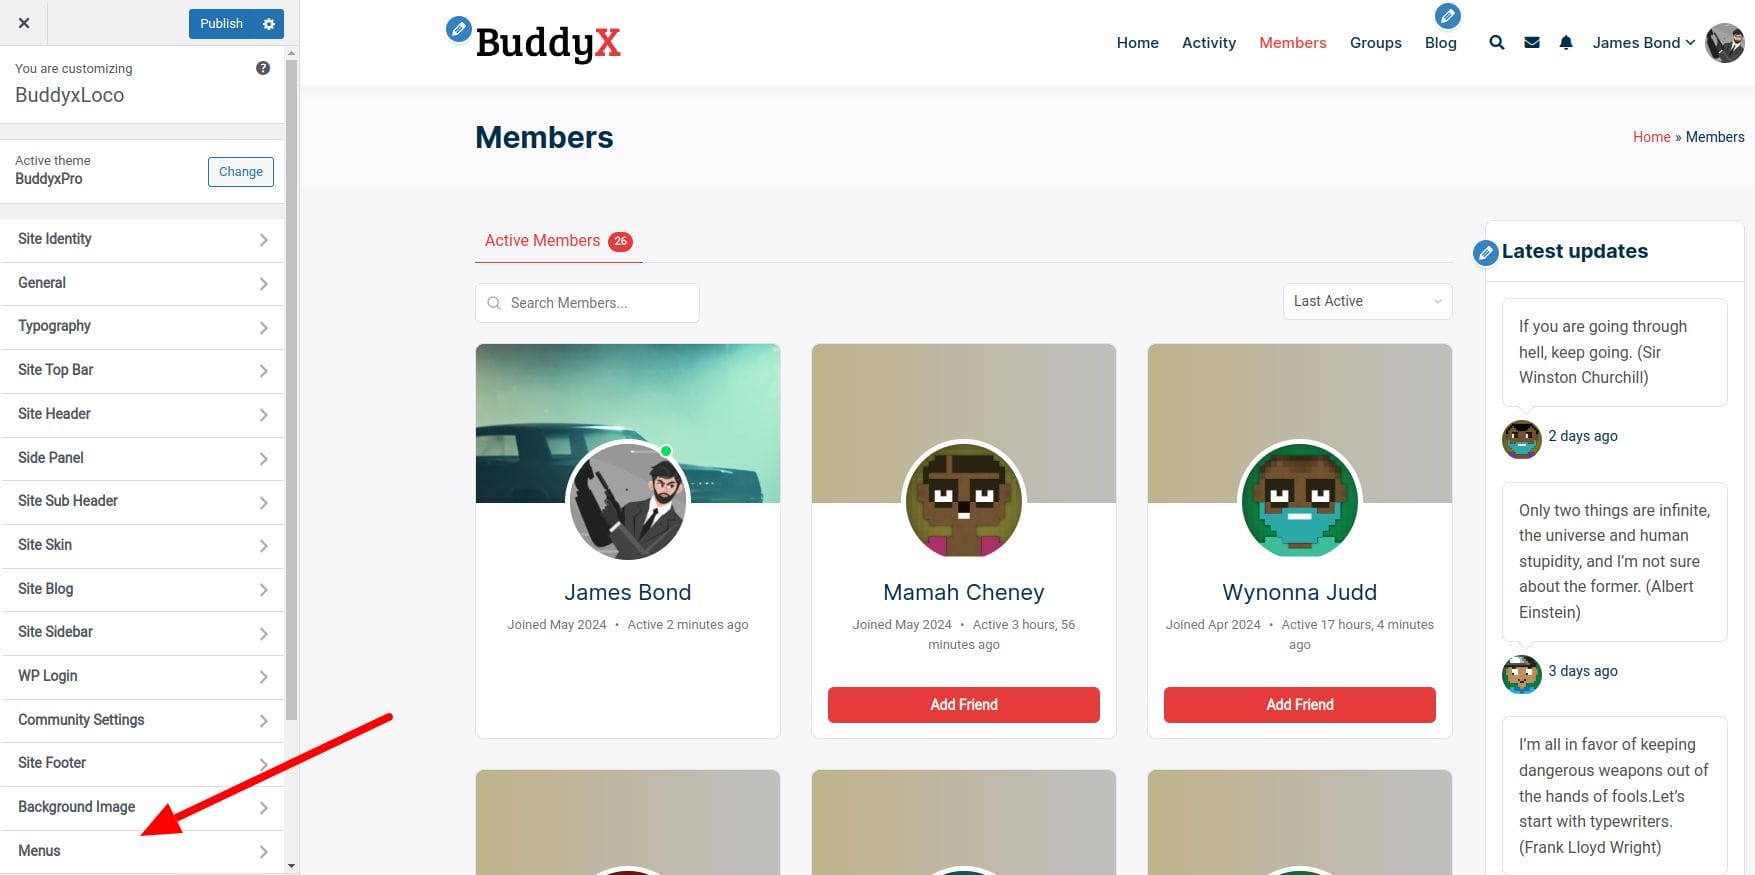
3. Select from the Primary Menu, User Menu, or Side Menu options.
4. Rename the menu item you want to change.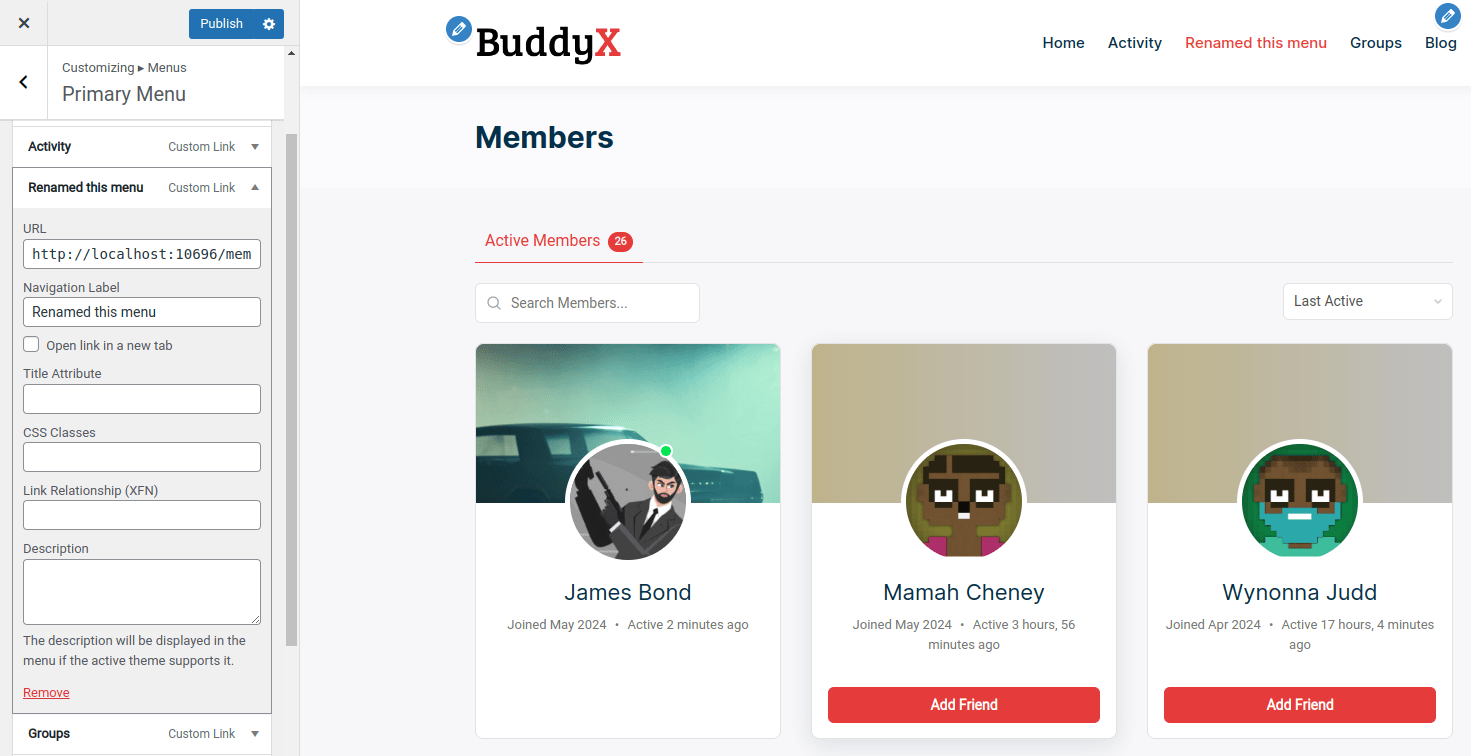
How to Rename BuddyPress Profile Nav Items and subheadings?
To completely modify the names of BuddyPress profiles, including their subheadings, you can utilize translation plugins. Among the various options, we will use Loco Translate for this purpose. Before proceeding, remember to backup your website to avoid any potential data loss.
1. Backup Your Website.
2. Download, Install and Activate Loco Translate.
3. Click on Loco Translate select plugins >> BuddyPress. Now, select new language.
4. Under choose a language select your preferred language and click on start translating.
5. Under Editor, write the word you want to translate in filter translation, here we are gonna change group name to towns.
6. From source text select the word you want to rename and rename it inside English translation.
7. When you have rename all the required fields then click on save.

8. This is how your website will look now.
Why Rename BuddyPress Profile Nav Items?
While learning how to rename BuddyPress profile don’t forget why renaming Buddypress profile is essential.
1. Improved User Experience
i) Clarity and Intuition: Renaming nav items to terms that are more intuitive for your users can make it easier for them to navigate your site. For example, changing “Activity” to “Updates” might be more understandable for users who are accustomed to social media platforms.
ii) Consistency with Site Branding: Customizing nav items to match your site’s branding and terminology ensures a consistent experience. This can make your site feel more professional and cohesive, enhancing user trust and engagement.
Also Read: Best Business Automation Software
2. Enhanced Functionality
i)Tailored Navigation: Depending on your community’s needs, certain default BuddyPress nav items might not be relevant. Customizing these items allows you to tailor the navigation to what is most useful for your users, potentially adding or renaming items to fit specific community features or activities.
ii) Simplified Interface: By removing or renaming less useful nav items, you can streamline the user interface. A simplified navigation menu can reduce cognitive load and make it easier for users to find what they need quickly.
3. Increased Engagement
i) Highlighting Key Features: If your community has unique or standout features, renaming nav items to draw attention to these can encourage more user interaction. For instance, renaming “Groups” to “Communities” might encourage users to explore and participate more actively.
ii) Personalization: Personalized navigation can make users feel more at home. By customizing nav items based on user roles or preferences, you can create a more engaging and personalized experience.
Also Read: Best AI Tools for Stock Market Analysis
4. SEO Benefits
i) Keyword Optimization: Renaming nav items with SEO-friendly terms can help improve your site’s search engine rankings. This is particularly useful if your nav items are indexed by search engines and can contribute to your overall SEO strategy.
5. Adaptation to Community Growth
i) Scalability: As your community grows, its needs might change. Customizing nav items allows you to adapt the site structure accordingly, ensuring that the navigation remains relevant and useful as new features and sections are added.
Customizing Profiles for User-Friendly Navigation
Customizing BuddyPress profile navigation items and URLs plays a pivotal role in creating a user-friendly and personalized community website. By renaming navigation items, modifying URLs, and leveraging translation plugins like Loco Translate, you can tailor your site to better suit your community’s needs and enhance overall user satisfaction.
Customization options not only improve navigation clarity but also ensure consistency with your site’s branding, potentially boosting user engagement and optimizing your site for search engines. Thus how to rename BuddyPress profile is an important leap in your community building experience.
Whether you’re simplifying navigation, emphasizing key features, or adapting to community growth, the flexibility to learn how to rename BuddyPress profile empowers you to craft a more intuitive and compelling social networking experience. Always remember to backup your website before making significant changes and thoroughly test to ensure seamless functionality.
Interesting Reads:
How to Automatically Move Posts with New Comments and Likes