
LearnDash Dashboard is an essential plugin designed by wbcomdesigns to elevate your LearnDash-powered e-learning experience. Specifically tailored for LearnDash users, this versatile plugin serves as your go-to tool for enhancing course management, tracking learner progress, and optimizing overall performance.
Learndash Dashboard Plugin gives a separate dashboard to admin, instructors, as well as students. You can easily manage your courses, lessons, and reports by using the convenient features of the dashboard. In addition, it allows you to track the activities of your course.
This plugin provides four different types of dashboard views:
1. Administrator View
2. Instructor View
3. Group Leader View
4. Student View
This comprehensive guide is designed to provide you with an in-depth understanding of the privileges and responsibilities that come with the Administrator role in the LearnDash Dashboard plugin. As an Administrator, you hold the keys to the kingdom. You have the power to create, manage, and optimize the e-learning experience for all users. But with great power comes great responsibility. That’s why we’ve created this guide to help you navigate the myriad of features and settings available to you.

Quick Links
Privileges of an administrator
1. Control
As an administrator, you wield unparalleled control over the LearnDash Dashboard, granting you the authority to shape your e-learning platform according to your vision. It provides full access to every feature and setting, you have the power to create, manage, and optimize courses with ease. From defining course structures and managing enrollments to monitoring learner progress and analyzing performance metrics, every aspect of your platform lies within your grasp. By using this level of control, you can tailor the learning experience to meet the unique needs of your organization, fostering engagement, facilitating communication, and driving educational success. You get the back-end control of the site.
Also Read: How to Allow Customers to Add Tips in WooCommerce
2. General settings
You have the ability to decide whether you wish to approve various courses or not, putting you in control of the approval process. This settings have different components which are as follows:
1. Page Mapping: You can choose the default page for Dashboard page, Instructor registration and instructor page.
2. Dashboard Widgets: Here you can choose to which role you want to provide the following statistics
a) Dashboard Page Title: If you want to show title of the page or not.
b) Summary of LearnDash Statistics: Learndash statistics on the dashboard page.
c) Course Completion chart: To view the Course completion report.
d) Top Courses Chart: Displays a report of the most completed Courses during a specific time frame.
e)Student Details: To show student progress.
3. Dashboard Components Menu: Here you can enable announcement and E-mail integration.
4. Welcome Screen Settings: Choose the cover image
5. Single Instructor Page: Here you can choose number of grids you want to show. If you want to show progress bar and course content.
3. Design
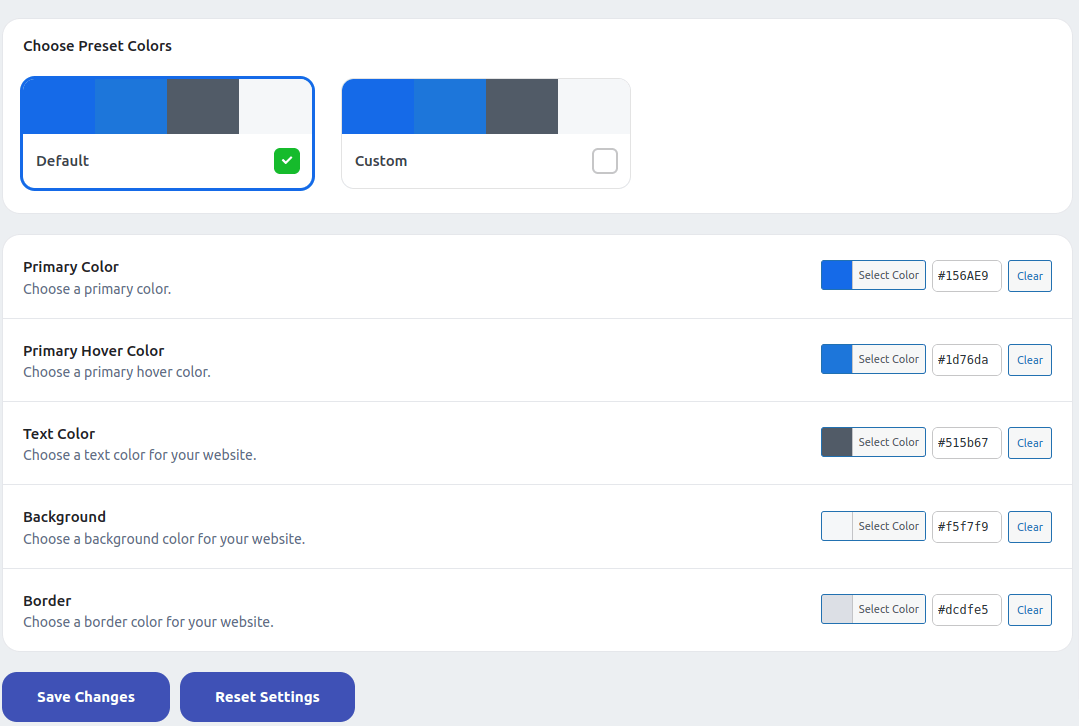
You have the option to customize the design of the dashboard, including primary and primary hover colors, text color, background color, and border color.
4. Dashboard tiles

It contains two sections dashboard statistics and Dashboard Chart Color. It shows the details related to courses and you can choose the different colour of the charts.
5. Dashboard Menu

You choose the different sections displayed at the front-end of the dashboard for different user role.
6. Student Activity
You can choose to hide or show the user live activity to keep an eye and to create different statistics.
7. Field Restrictions
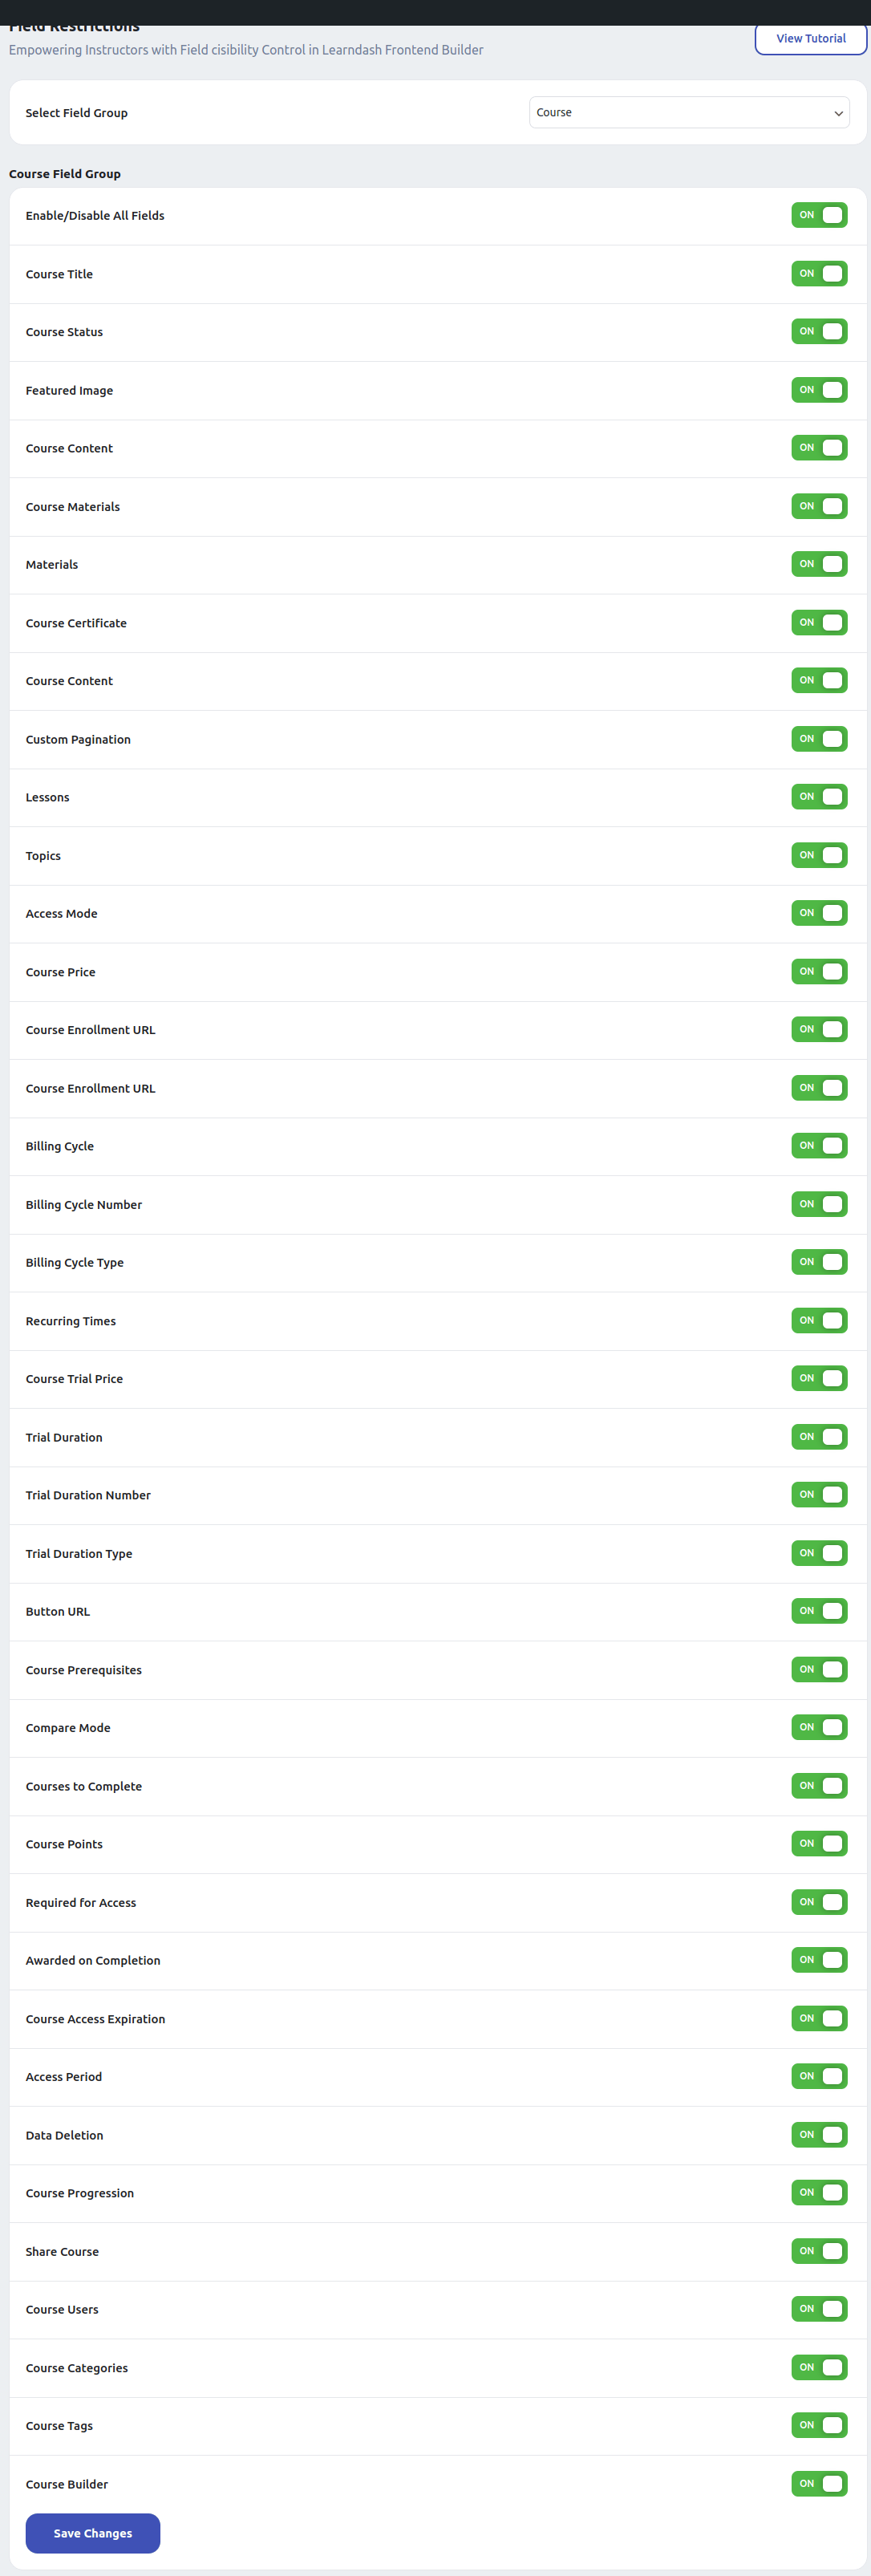
The site admin can disable any of these fields as per his choice with the frontend functionalities of Learndash Dashboard.
The site administrator can choose these options among following groups:
1. Course Field Group
2. Lesson Field Group
3. Topics Field Group
4. Quiz Field Group
5. Question Field Group
8. Instructors

Here you can approve or reject the user registration as an instructor, request.
9. Zoom Meeting Integration
It allows you to integrate Zoom meetings in your e-Learning website. You need configure following settings in order to use zoom meetings. You can choose to create meetings using the admin account and add co-hosts also.
10. Monetization
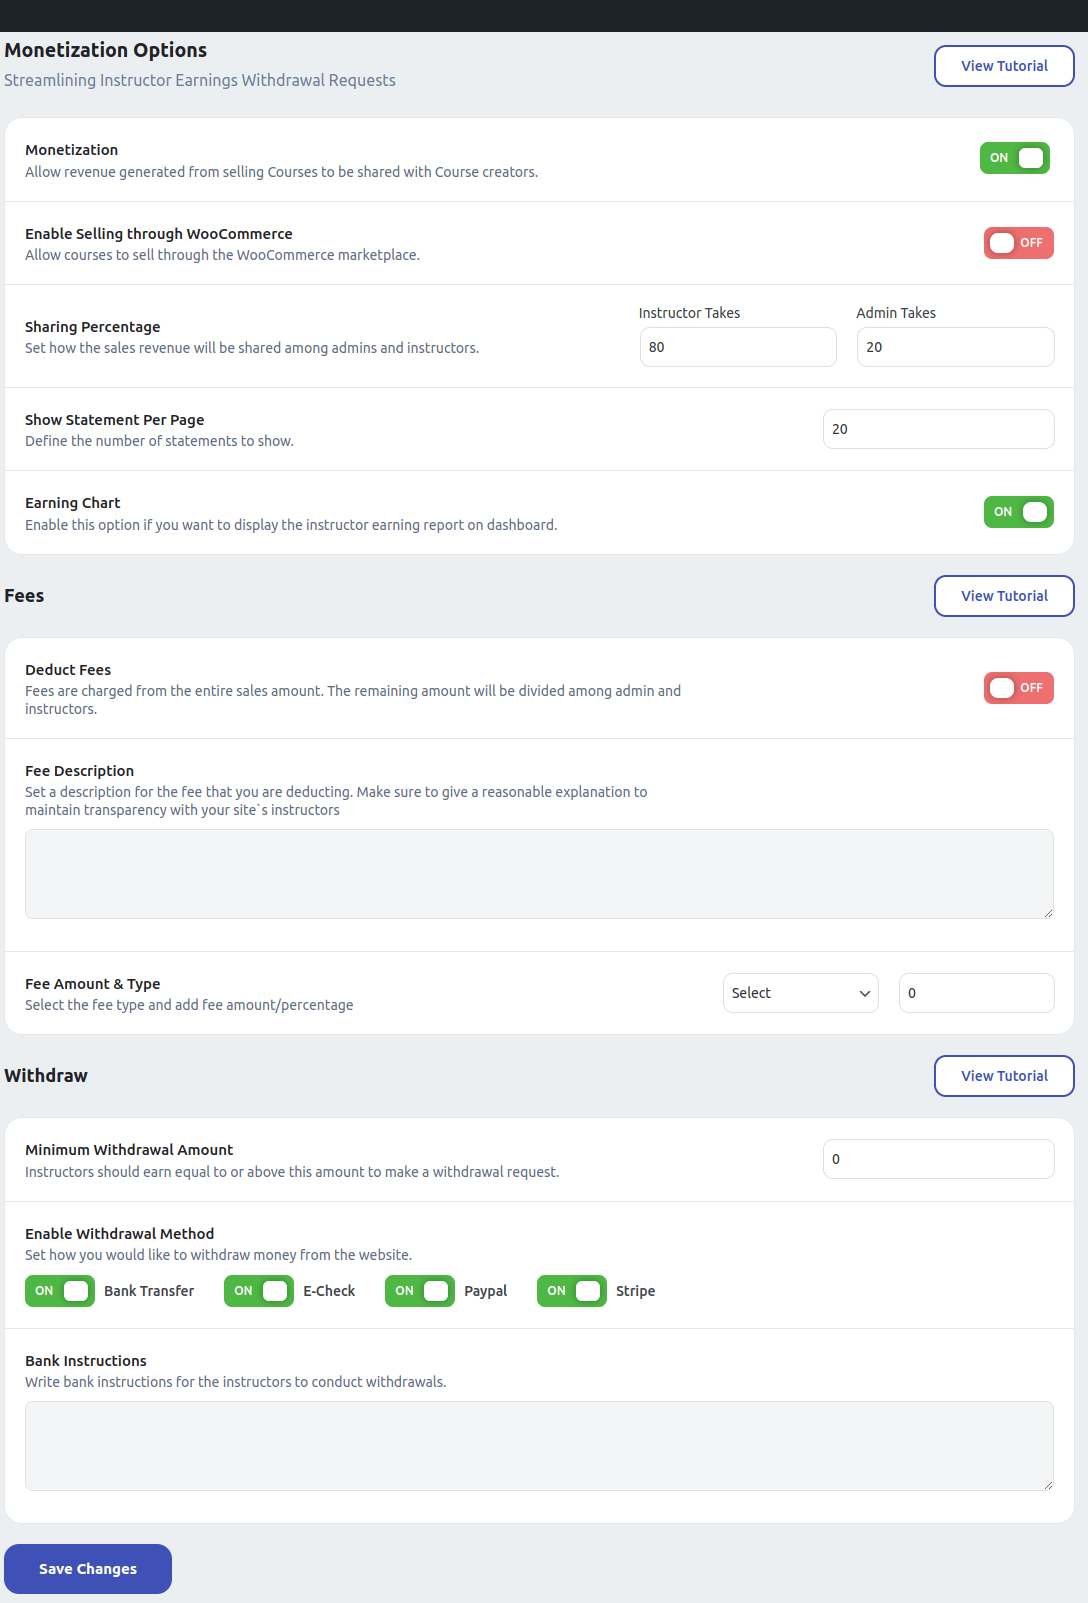
To enable course sales through WooCommerce, toggle the “Enable Selling through WooCommerce” option. Remember, you’ll need to have the Learndash WooCommerce Integration plugin installed and activated for this feature to work seamlessly. Once enabled, a corresponding product will automatically be created upon course creation.
You can adjust the revenue sharing percentage between administrators and instructors, set the number of statements per page, and choose whether to display an earning chart on the dashboard. If you opt to deduct fees from sales, specify the fee amount and type, and provide a clear description to maintain transparency with instructors.
11. Commission Report
The LearnDash Dashboard plugin offers a convenient feature for administrators to set and manage commissions effortlessly. Additionally, administrators have the capability to export commission reports in CSV format, providing them with valuable insights into the calculation and distribution of commissions earned by instructors. Below are the steps to access the commission report:
1. Review Commission Details: Once in the commission reports section, administrators can review detailed information about the commissions earned by instructors. This includes data on the calculations and distribution of commissions for each instructor.
2. Export Commission Report: To further analyze or share commission data, administrators can export the commission report in CSV format. This export feature allows for easy integration with external tools or for sharing with relevant stakeholders.
12. Time Tracking

This feature in the LearnDash Dashboard plugin enables administrators to track the time spent by students on a course. Should a student remain idle for a specified duration, administrators can prompt a pre-written message to engage the student. This functionality not only helps administrators monitor student activity but also facilitates proactive communication to enhance student engagement and learning outcomes. By leveraging this feature, administrators can ensure that students remain actively involved in the course and address any potential issues or concerns promptly.
13. Invite User
It provides an option to invite user to new course by sending an e-mail.
14. Invitation Log
It shows how many invitation has been sent and how have accepted the invitation to join a course or a meeting.
15. Email Logs

It shows the list of mail sent to students by the instructor or group leader.
16. Front-end view of an administrator dashboard
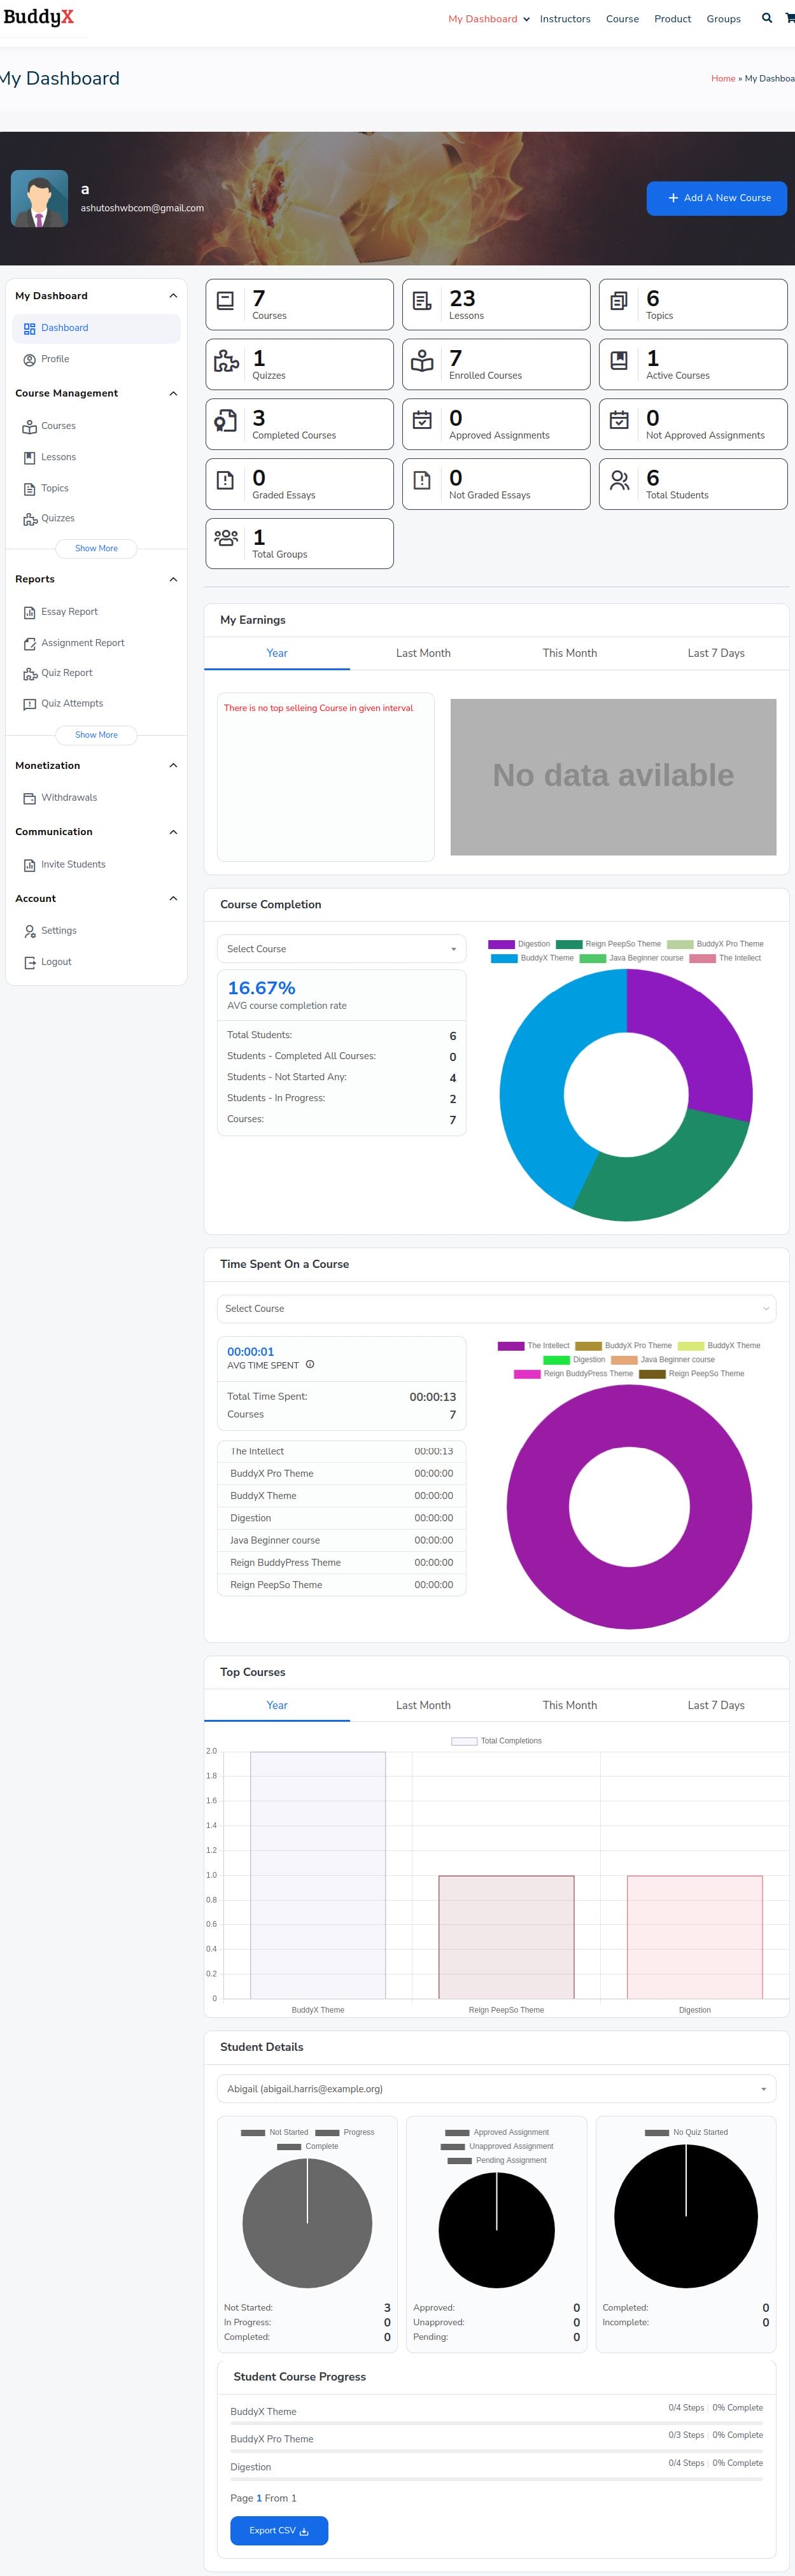
The front-end of the administrator dashboard looks something like this.

Conclusion
Its robust features and intuitive interface provides administrators unparalleled control over course management, learner progress tracking, and overall platform optimization. The customizable dashboard views to granular control over settings and design, administrators can tailor the platform to meet the unique needs of their organizations.
Leveraging features such as commission management, time tracking, and monetization options, administrators can drive engagement, facilitate communication, and ensure transparency in course delivery and revenue distribution. With the ability to export commission reports and track student activity, administrators have the tools they need to make informed decisions and drive educational success.
In conclusion, the LearnDash Dashboard plugin empowers administrators to create a dynamic and engaging e-learning environment that fosters learning and growth. With its comprehensive suite of features and user-friendly interface, LearnDash Dashboard is the ultimate solution for administrators looking to elevate their LearnDash-powered e-learning platforms to new heights of excellence.
Interesting Reads:

