
Verifying your Pinterest account on WordPress is a straightforward process.

Here are the steps to follow: (Pinterest Account On WordPress)
1. Log in to your Pinterest Account On WordPress and go to your profile.
2. Click on the three dots in the top right corner of your profile page and select “Settings.”
3. Scroll down to the “Claim” section and click the “Claim” button next to the website option.

4. Enter your website URL in the provided field and click “Claim.”
5. On the next screen, you’ll see a list of verification methods. Select the “HTML tag” option.
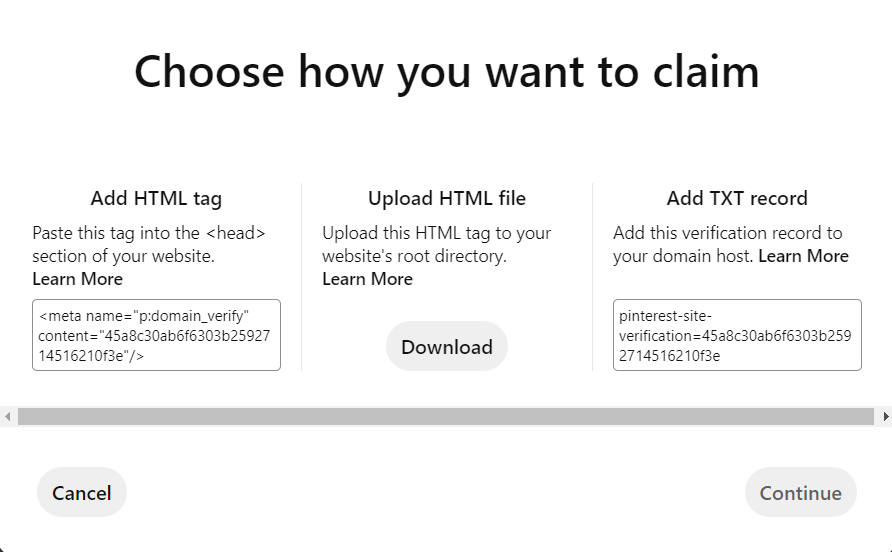
6. Copy the provided HTML tag code.
7. Log in to your WordPress dashboard in a new browser tab.
8. Click on “Appearance” in the left-hand menu and select “Editor.”
9. In the editor, look for the “header.php” file and click on it to open it.
10. Scroll to the bottom of the file and paste the HTML tag code you copied in step 6 just before the closing </head> tag.
11. Save the changes to the header.php file.
12. Go back to your Pinterest account and click “Complete Verification.”
13. Pinterest will then verify that the code is on your website, and once verified, your account will be successfully linked to your Pinterest Account On the WordPress website.

Once your website is verified, your Pinterest profile will display a checkmark next to your website’s URL, indicating that it has been verified. This can help build credibility with your audience and potentially increase traffic to your website from Pinterest.