Are you looking to establish yourself as a public figure and connect with your audience on a BuddyBoss community? Creating a public figure page can be an excellent way to showcase your expertise, engage with your followers, and build a thriving community around your brand. Whether you’re an influencer, expert, or thought leader, a BuddyBoss community provides a powerful platform to connect, share knowledge, and foster meaningful interactions.
In this blog post, we’ll guide you through the process of creating a captivating public figure page on BuddyBoss, enabling you to cultivate your online presence and make a lasting impact on your audience. Let’s dive in and discover how you can leverage this powerful tool to amplify your influence and build a thriving community of engaged followers.
What is BuddyPress Business Profile Plugin

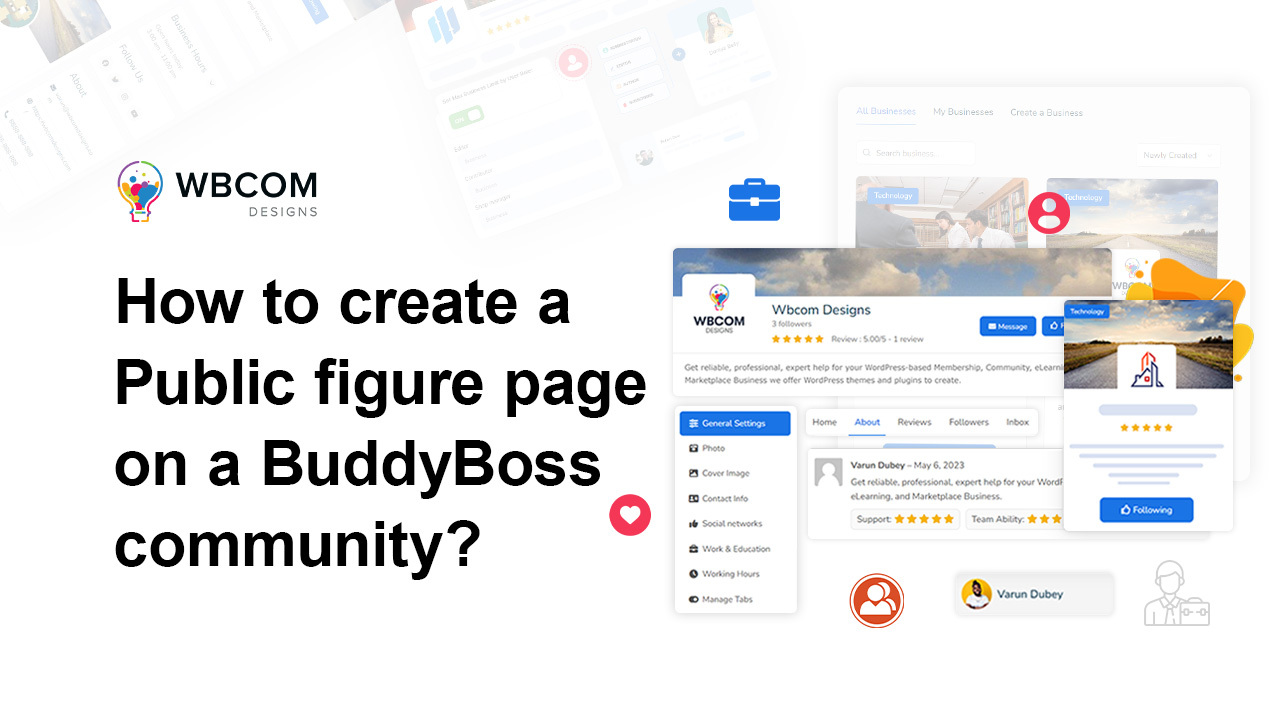
BuddyPress Business Profile is a plugin that allows you to create and display business pages on your site powered by the BuddyBoss platform. You can use it to showcase your company’s details, products, services, reviews, ratings, and more. You can also create multiple company profiles and assign them to different members or groups.
Some of the features of the BuddyPress Business Profile plugin are:
- Business profile to enhance your online presence. You can personalize your profile fields, upload your logo and cover image, and add your contact information and social links.
- Business activities to keep your members interested, informed, and up to date. You can post engaging announcements, images, and videos on your business page activity feed, and communicate with your followers through comments and likes.
- Private messaging to establish a direct line of communication with your community members. You can manage interactions with members and much more through a specific inbox for each page.
- Pages roles and management to assign different levels of authority and access to your page admins, editors, and moderators. You can also control who can create, edit, delete, and invite users to your pages.
- Integration with BuddyPress and BuddyBoss to extend your online community with business pages. You can create public, private, or hidden pages and set different rules and settings depending on the page type. You can also link your pages with your members and groups.
How to Create a Public Figure Page on a BuddyBoss Community Site
Step 1: Install and activate the plugin
The first step is to install and activate the BuddyPress business profile plugin on your WordPress site. You can download the BuddyPress Business Profile plugin from its official website and upload it to your site via Plugins > Add New > Upload Plugin.
Once the plugin is installed and activated, you will see a new menu item called Business Pages on your WordPress dashboard.
Step 2: Create a new business page
The next step is to create a new public figure page. You can do this by going to Business Pages > Add New and filling out the required fields.
Community admin will configure Business page settings by navigating to WB Plugins > BuddyPress Business Profile > General Settings > Business listing page.
Public Figure page creation is easy and simple with the BuddyPress Business Profile plugin. Navigate to the Businesses page provided by the plugin, then click Create New Business.
When creating the space, you will need to select the “Business” option from the “Space Type” dropdown menu.

Once you have created the space, you will need to add Public Figure information. This information will include your name, address, phone number, website, and email address. You will also need to add a logo and cover image for that Public Figure.
Once you have added information, you can start adding content to your page. This content can include blog posts, news articles, events, and products.
Once you have entered all the information for your page, click on the Publish button to make it live.
Step 3: Integrate Google Map
You can use the BuddyPress business profile plugin to display a Google map on your pages. You just need to enter your Google Map API key in the plugin settings.
Go to the WB Plugins> BP Business Profile > General Setting > Google Maps API Key, and enter the API Key.
Read our article to know How to create the API Key.
Step 4: Manage Page Label
With the BuddyPress business profile plugin, you can easily change the name and URL of your pages. Just go to the plugin settings and adjust the label and slug options.
Go to the WB Plugins> BP Business Profile > General Setting

Step 5: Business Profile & Cover
With this plugin, the site admin can choose a default cover image for the new pages that have not uploaded their own profile and cover pictures.

That’s it! You have successfully created a public figure page on a BuddyBoss community using the BuddyPress business profile plugin.
How to Add More Features to BuddyBoss Community
BuddyBoss is a powerful platform that lets you create and manage online communities, courses, memberships, and more. But what if you want to add more features and functionalities to your BuddyBoss community? How can you extend and customize your site to suit your specific needs and goals?
That’s where Wbcom Designs comes in. Wbcom Designs is a leading WordPress development company that offers a wide range of premium and free plugins and add-ons for BuddyPress, BuddyBoss, LearnDash, WooCommerce, and more.
With Wbcom Designs plugins and add-ons, you can enhance your BuddyBoss community with awesome features such as:
- BuddyPress Member Blogs: Allow your members to create and manage their own blog posts from their profile. You can also enable collaborative learning, gamification, lesson unlocks, quizzes, surveys, certificates, and more.
- BuddyPress Member Reviews: Allow your members to rate and review other members’ profiles based on multiple criteria. You can also moderate the reviews by approving or deleting them.
- BuddyPress Group Reviews: Allow your members to rate and review the community groups based on multiple criteria. You can also moderate the reviews by approving or deleting them.
- BuddyPress Check-ins: Allow your members and groups to post updates along with selecting their current location. You can also display a Google map on your site with all the check-ins.
- BuddyPress Statistics: Track and analyze the activity and performance of your site, members, groups, courses, products, and more. You can also display charts and graphs on your dashboard or frontend.
- BuddyPress Post from Anywhere: Allow your members to post updates from anywhere on your site by using a simple shortcode. You can also enable media uploads, emojis, GIFs, hashtags, mentions, and more.
- BuddyPress Social Share: Allow your members to share the content from your site to their social media platforms. You can also customize the share buttons and icons.
- BuddyPress reCaptcha: Protect your site from spam and bots by adding a reCaptcha verification to your registration, login, password reset, comment, contact form, and more.
Check out more plugins by Wbcom Designs
We hope this blog post has helped you learn how to create a celebrity page on a BuddyBoss community using the BuddyPress business profile plugin. If you have any questions or feedback, please let us know in the comments below.