

Creating a seamless community platform requires tools that work perfectly together. BuddyX Theme and BuddyBoss are a dynamic duo, offering a comprehensive solution for building interactive, scalable, and visually appealing online communities. This guide will walk you through the steps to integrate BuddyX Theme with BuddyBoss, ensuring a smooth setup process that maximizes the potential of both tools.
This kind of setup pays off well beyond just getting the visuals to look right. A properly integrated BuddyX and BuddyBoss stack gives you a foundation that handles the mundane, unglamorous parts of running a community, permissions, notifications, activity logging, consistently, so the actual community management work can focus on the members and the content rather than fighting the platform.
Before diving into the steps, it helps to understand what each piece actually contributes. BuddyBoss Platform is the engine, it handles the underlying data structures for profiles, groups, activity feeds, and messaging. BuddyX is the presentation layer built specifically to render that data cleanly, with layout options and styling that a generic theme wasn’t designed to handle. Running BuddyBoss on a mismatched theme usually means broken layouts on profile and group pages, since those templates expect specific CSS classes and markup structures that only a BuddyBoss-aware theme provides out of the box.
1: Preparation (Requirements and Setup)
Before you begin, it’s essential to have the right resources and configurations in place. Here’s what you’ll need:
Prerequisites
Ensure the following are ready before starting:
- WordPress Installation: WordPress should be installed on your hosting server. A VPS with at least 4GB RAM and 2 CPUs is recommended for optimal performance.
- BuddyBoss Platform: Download the free BuddyBoss Platform to enable social networking features. Download BuddyBoss Platform
- BuddyX Theme: Get the BuddyX Theme (free or Pro) from BuddyX Theme.
- Hosting and Domain: Use a reliable hosting service like DigitalOcean, Cloudways, or SiteGround.
The RAM and CPU recommendation deserves a bit more context. A community site running BuddyBoss’s activity feeds, real-time notifications, and media uploads puts noticeably more load on a server than a standard brochure WordPress site, especially once you have more than a handful of active members posting and commenting simultaneously. Undersized hosting is one of the most common root causes behind reports of a “slow” BuddyX and BuddyBoss integration, when the actual bottleneck is server resources rather than anything wrong with either plugin’s configuration.
2: Step-by-Step Installation and Configuration
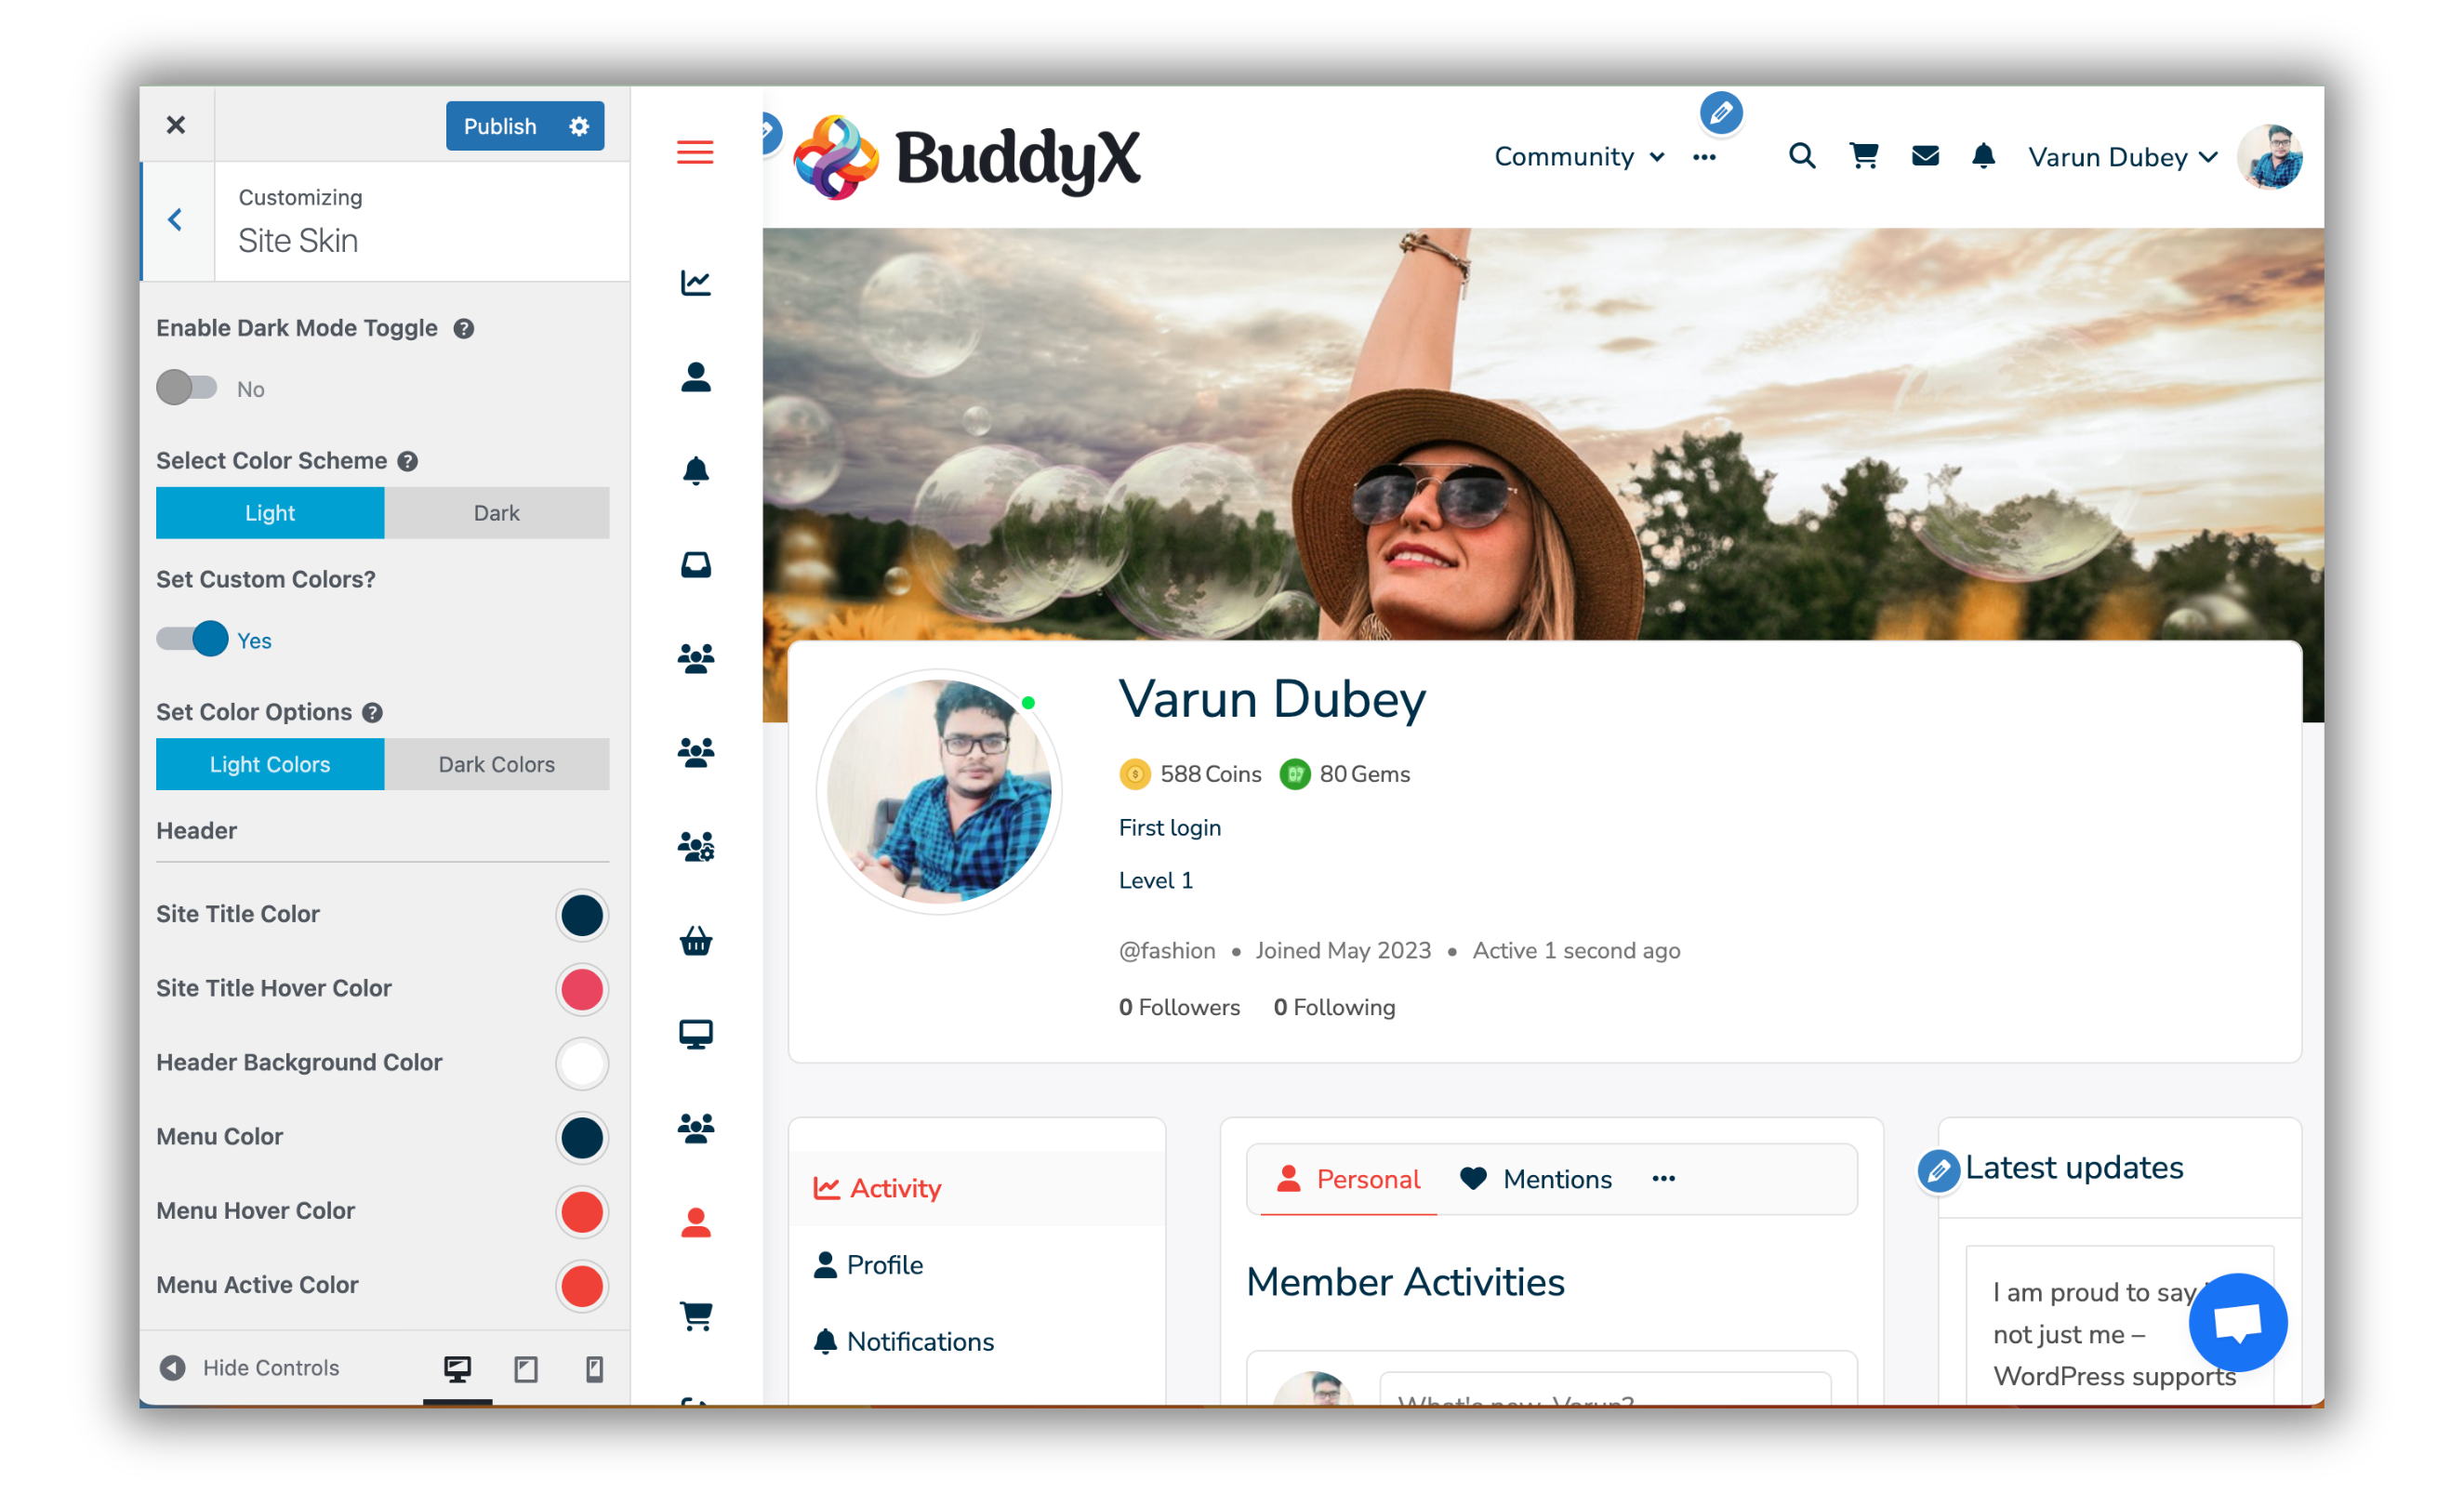
Follow these steps to integrate BuddyX Theme with BuddyBoss:
Install BuddyBoss Platform
- Log in to your WordPress dashboard.
- Navigate to Plugins > Add New.
- Click Upload Plugin, select the BuddyBoss Platform ZIP file, and click Install Now.
- Activate the plugin.
Install BuddyBoss Platform before installing BuddyX, not after. The theme detects BuddyBoss on activation and adjusts several of its own default settings accordingly, so installing them in reverse order can leave the theme running its non-community defaults until you manually revisit the Customizer settings afterward.
Install BuddyX Theme
- Go to Appearance > Themes in your WordPress dashboard.
- Click Add New, then Upload Theme.
- Upload the BuddyX Theme ZIP file and click Install Now.
- Activate the BuddyX Theme.
Configure BuddyX Theme
- Navigate to Appearance > Customize.
- Adjust the following settings:
- Select Header and Footer Layouts that align with your brand.
- Customize Typography and Colors for consistency with your design.
- Enable community features like activity streams, group discussions, and private messaging.
Integrate BuddyBoss Features
- Ensure BuddyBoss features like user profiles, activity streams, and groups are enabled under BuddyBoss > Components.
- Customize settings such as group types, member profiles, and privacy options.
- Test your integration by creating sample groups, posts, and activities.
Testing with sample content matters more than it might seem. Create at least one test group, post a few activity updates, upload a profile photo, and send a test private message before inviting real members. This catches layout or permission issues while the stakes are low, rather than discovering a broken group page after your community has already started using it.
3: Essential Tools for Optimization

To ensure optimal performance and functionality, consider adding these tools:
Performance Optimization
- WP Rocket: This premium caching plugin boosts site speed with features like lazy loading, database optimization, and CDN support. Learn More.
When configuring WP Rocket on a BuddyBoss-powered site, exclude logged-in user pages and any AJAX-heavy areas like the activity feed from aggressive page caching. Community platforms serve a lot of dynamic, personalized content, notifications, activity feeds specific to who’s logged in, and caching those pages the same way you’d cache a static blog post can serve stale or incorrect content to members.
Image Optimization
- EWWW Image Optimizer: Compresses media files without losing quality. Ideal for free, lossless image compression. Learn More.
- Imagify: A paid solution offering advanced compression and seamless integration with WP Rocket. Learn More.
Image optimization matters more for a community site than a typical blog, since members uploading profile photos and media posts from their phones often upload considerably larger files than necessary. Setting up automatic compression on upload, rather than relying on members to resize their own images first, keeps your media library from ballooning in size as the community grows.
Debugging and Troubleshooting
- WP Debugging Plugin: Quickly identify and resolve errors with detailed logs. Learn More.
SEO Enhancement
- Yoast SEO: Improve your community’s visibility on search engines with intuitive SEO tools. Learn More.
For a BuddyBoss community specifically, pay attention to how Yoast (or any SEO plugin) handles member profile pages and group pages. Most communities don’t want thousands of individual member profiles indexed in Google search results, both for privacy reasons and because that volume of thin, near-duplicate pages can dilute a site’s overall SEO signal. Setting profile and activity pages to noindex while keeping your actual content pages, articles, group descriptions, landing pages, indexed normally is worth configuring deliberately rather than leaving on the plugin’s default settings.
Customizing the Look Beyond the Default Setup
Once the base integration is working, most communities want to push the visual customization further than the Customizer’s default options allow. BuddyX Pro adds more granular control here: custom color schemes tied to design tokens rather than one-off hex values, additional header and footer layout variants, and block pattern support that makes it easier to build out custom landing pages without touching CSS directly.
If your brand guidelines call for something the Customizer genuinely can’t achieve, a lightweight child theme is the right tool rather than editing BuddyX’s core files directly. Direct core file edits get wiped out the next time the theme updates, which is a frustrating and entirely avoidable way to lose custom work. A child theme with just the specific overrides you need survives theme updates cleanly.
Common Integration Pitfalls
A few mistakes show up repeatedly during this kind of setup, beyond the individual FAQ items below. Skipping the BuddyBoss setup wizard entirely is one of them; the wizard configures several settings, like which components are active and default privacy levels, that are tedious to hunt down individually in the settings menus afterward if you skip past it.
Another common mistake is activating every available BuddyBoss component immediately rather than starting with only what the community actually needs. Extra active components add navigation clutter and can introduce plugin conflicts with unrelated tools, without providing value if nobody’s using that specific feature yet. Enabling groups, forums, or media components incrementally as the community actually grows into needing them keeps the interface simpler for new members and reduces the surface area for something to break.
Common Gotchas That Trip Up First-Time Integrations
A handful of specific issues account for most of the support requests that come up during a BuddyX and BuddyBoss integration, and knowing about them ahead of time saves real troubleshooting time.
Component Order Confusion
BuddyBoss lets you enable and disable individual components independently, and the order in which you enable them can matter more than it seems. Activating Groups before Activity Streams, for example, can leave group activity feeds referencing a data structure that wasn’t fully initialized yet. If a specific feature looks broken right after setup, deactivating and re-enabling the relevant component, in the order BuddyBoss’s own documentation recommends, resolves this more often than digging through error logs first.
Menu Duplication
Both BuddyX and BuddyBoss register their own navigation menu locations, and it’s easy to end up with duplicate member menu items, one from the theme, one from the platform, showing up in unexpected places after activation. Checking Appearance > Menus carefully after the initial setup, rather than assuming the default configuration is clean, catches this before members notice a confusing double-navigation experience.
Caching Plugin Conflicts With Real-Time Features
Activity streams and notifications are meant to feel real-time, and an aggressive caching plugin configuration can accidentally serve a stale activity feed to logged-in members, making the community feel broken even though the underlying data is updating correctly. Most modern caching plugins, including WP Rocket, have specific settings or exclusion rules for BuddyPress and BuddyBoss-style dynamic content; confirming those exclusions are active is worth doing explicitly rather than assuming the default caching configuration handles it correctly.
Security Considerations for a Community Site
A community platform handles more sensitive data than a typical brochure site, member profiles, private messages, uploaded photos, so security deserves specific attention beyond the general WordPress hardening advice. Enable two-factor authentication for admin and moderator accounts at minimum, since a compromised admin account on a community site can expose every member’s private data at once, not just a single page’s content.
Review your privacy settings carefully during setup rather than leaving BuddyBoss’s defaults unexamined. Decide explicitly whether member profiles, activity feeds, and group content should be publicly visible to non-members or restricted to logged-in users only, since the right answer varies a lot depending on whether you’re running an open public community or a private membership space. A setting that felt fine during testing with three accounts can look very different once real members start sharing personal updates they assumed were only visible to fellow members.
File upload settings deserve a second look too. BuddyBoss allows member photo and document uploads by default in several components, and confirming file type restrictions and size limits are configured sensibly prevents both abuse and unnecessary server storage strain as the community grows.
Planning for Growth From the Start
A community that launches successfully often outgrows its original hosting plan faster than expected, and a few decisions made during initial setup make that growth easier to handle later. Choosing a host that supports easy resource scaling, rather than one that requires a full migration to move from a starter plan to something more robust, saves a disruptive mid-growth transition.
It’s also worth thinking about database growth specifically. Every activity post, comment, group membership change, and notification generates database rows, and a community that reaches several thousand active members will have a meaningfully larger database than the same site had during its first month. Regular database optimization, through a plugin or your hosting provider’s tools, keeps query performance from degrading gradually as that data accumulates, which matters more for a community site than for content that rarely changes.
Mobile Experience and Native Apps
BuddyBoss offers a companion app-building service (BuddyBoss App) that wraps a community site into a native iOS and Android app, and BuddyX’s responsive design is built with that use case in mind, alongside standard mobile browser access. If a native app is part of your community’s roadmap, confirm early which BuddyX layout options and BuddyBoss components are actually supported inside the app wrapper, since not every web-based customization translates directly into the native app experience, and discovering that gap after members are already using the app is a harder problem to solve retroactively.
Even without a dedicated native app, testing the full integration on an actual phone, not just a resized desktop browser window, catches real usability problems that a browser’s device emulator sometimes misses, particularly around touch target sizing on activity feed buttons and how the group navigation menu collapses on smaller screens.
4: Frequently Asked Questions
Q1: What should I do if I encounter visual inconsistencies or layout issues?
Solution: Ensure you are using the latest versions of BuddyX Theme and BuddyBoss Platform. Clear your browser cache and refresh the page to resolve any temporary display issues.
Q2: Why are certain community features not appearing on my platform?
Solution: Verify that the relevant components are enabled in BuddyBoss > Components. Double-check the settings to ensure everything is properly configured.
Q3: How can I improve the platform’s loading speed?
Solution: Use WP Rocket to optimize caching and compress images with EWWW Image Optimizer or Imagify. These tools significantly enhance site performance by reducing load times.
Q4: What should I do if I encounter unexpected errors or blank pages?
Solution: Install the WP Debugging Plugin to access error logs. Review the logs to identify the root cause and deactivate conflicting plugins or themes if needed.
Q5: How do I address plugin-related errors?
Solution: Deactivate recently added plugins one by one to pinpoint conflicts. Check for plugin updates or consider alternative plugins that serve the same purpose.
Q6: Can I migrate an existing BuddyPress site to this BuddyX and BuddyBoss setup?
Solution: BuddyBoss Platform is built as a fork of BuddyPress and generally handles existing BuddyPress data reasonably well, but back up your full database before switching. Test the migration on a staging copy of the site first, since group structures, custom fields, and any third-party BuddyPress add-ons can behave differently once BuddyBoss Platform is active.
Q7: Does switching to BuddyX break any custom CSS I already added to my old theme?
Solution: Custom CSS tied to a previous theme’s specific class names typically won’t carry over cleanly, since BuddyX uses its own markup structure. Plan to rebuild custom styling within BuddyX’s Customizer or a child theme rather than expecting old CSS snippets to apply correctly against different HTML.
The other path: BuddyX with the free BuddyNext engine
Everything above assumes you are already on the BuddyBoss platform, and that is a perfectly supported path. If you are not committed to BuddyBoss, BuddyX also pairs directly with BuddyNext, a free standalone community engine from Wbcom Designs. Because the theme and the engine come from the same team, they are built to work together out of the box, and the setup skips a few of the compatibility steps you would otherwise need to verify manually.
The two paths serve different starting points. BuddyBoss is the right choice if you have an existing BuddyBoss-powered site or want its specific feature set. BuddyNext is worth considering if you are starting fresh and want a simpler configuration with fewer moving parts from day one.
Getting Started With Your Community
Integrating BuddyX Theme with BuddyBoss is a straightforward process that unlocks the potential for building an exceptional community platform. By using tools like WP Rocket, EWWW Image Optimizer, and WP Debugging, you can optimize performance and troubleshoot issues effectively. Take the setup one section at a time, verify each piece with real test content before moving to the next, and the full integration is realistic to complete in an afternoon even for a first-time setup. Start your journey today with BuddyX Theme and BuddyBoss Platform.
Interesting Reads:
Free Tools to Enhance Your BuddyBoss Community