In the world of WordPress, the Gutenberg Block Editor is a significant milestone transforming the way users create content within the platform. Whether you’re a seasoned WordPress user or just starting out, mastering the Block Editor is essential for creating visually stunning and engaging content. In this tutorial, we’ll learn about Gutenberg Block Editor, exploring its features and functionalities step by step.

Quick Links
1. Understanding the Basics
1. What is the Gutenberg Block Editor?
The Gutenberg Block Editor is the default content editor for WordPress introduced in WordPress version 5.0 in December, 2018. Named after Johannes Gutenberg, the inventor of the movable-type printing press, the Gutenberg editor revolutionises the content creation experience within WordPress by adopting a block-based approach
2.Key features and benefits
Some of the key features and benefits are Block based Editing, Multimedia Integration,Reusable blocks, Full site editing capabilities, Integration with Themes and Plugins and Many more.
3. Why use the Block Editor over the Classic Editor?
The Block Editor organises content into individual blocks, making it easier to create, manage, and customise different types of content elements (e.g., paragraphs, headings, images) within a post or page. Gutenberg block Editor priorities accessibility and usability, ensuring that the editor is intuitive and easy to use for all users, including those with disabilities. Gutenberg is actively developed and maintained by the WordPress community, with regular updates and improvements being made to the editor’s features and functionality. This ensures that Gutenberg remains a modern and reliable content editing solution for WordPress users.
2. Getting Started
1. Accessing the Block Editor
Log in to your WordPress dashboard. Once logged in, hover over to the “Posts” or “Pages” option in the left sidebar menu, depending on whether you want to create a new post or page.
2. Exploring the Interface
1. Editor Window: This is the main area where you’ll compose your content using blocks. Each block can be edited individually, and you can easily move, delete, or customise blocks as needed.
2. Sidebar: On the right side of the editor window, you’ll find the sidebar, which contains block settings and options specific to the selected block. Depending on the block type, the sidebar may include options for formatting, alignment, and additional settings.
3. Toolbar: Above the editor window, you’ll find the toolbar, which provides quick access to common editing actions and formatting options. The toolbar changes dynamically based on the selected block, offering relevant options for each block type.

3. Exploring Block Types
1. What are blocks?
Blocks are the fundamental units of content in the Gutenberg Block Editor, each serving a specific purpose and allowing you to create diverse and visually appealing layouts for their posts and pages. Each block has its own set of editing and customisation options, allowing you to juggle with the appearance and functionality of each content element.
2. Common Block Types
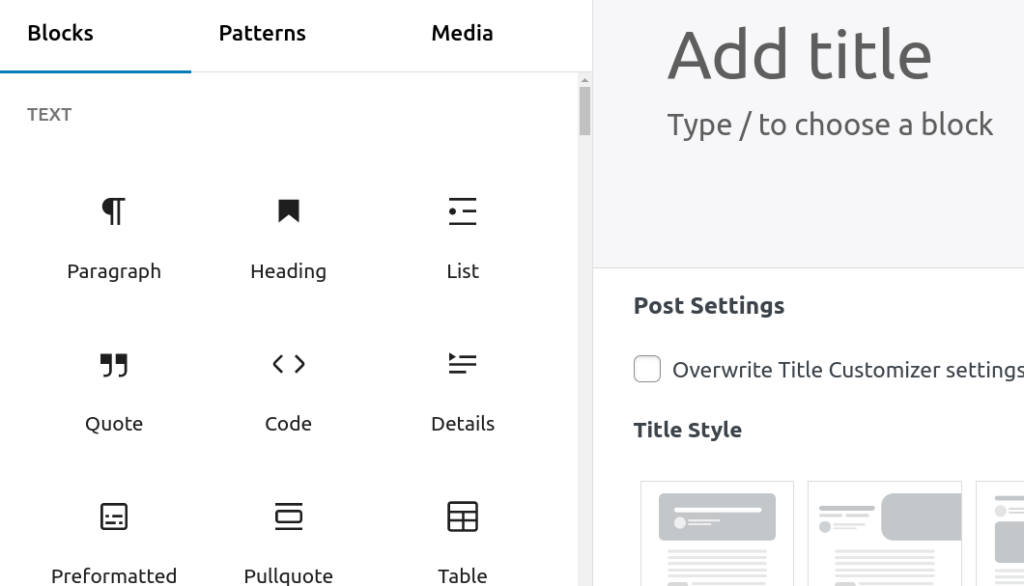
1. Paragraph: Used for adding text content. You can type or paste text directly into a paragraph block.
2. Heading: Allows you to create headings of different levels (e.g., H1, H2, H3) to structure their content hierarchically.
3. Image: Enables you to insert images into their posts or pages. Users can upload images from their computer or choose existing images from the media library.
4. Gallery: Lets you create image galleries by adding multiple images into a single block.
5. List: Provides options for creating bulleted or numbered lists, helping to organise content into easy-to-read formats.
6. Quote: Allows you to insert blockquotes to highlight important text or quotes within their content.
7. Embeds: Allows you to embed content from external sources such as YouTube videos, Tweets, Instagram posts, and more.
8. Button: Enables you to create buttons with customised text and link destinations.
3. Adding, deleting, and rearranging blocks
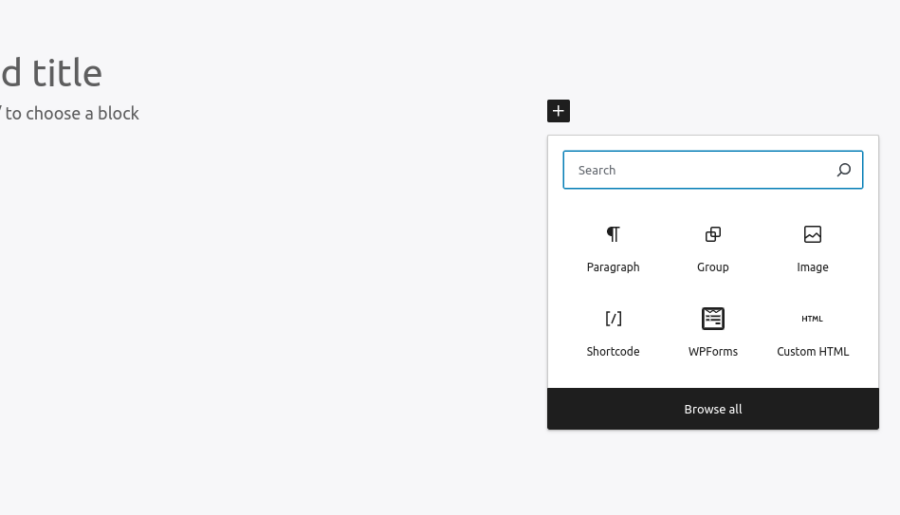
1. To add a new block, click on the “+” icon located at the top-left corner of the editor window or use the forward slash “/” shortcut. Choose the desired block type from the block inserter menu.
2. To delete a block, select the block you want to delete and click on the three-dot menu icon in the block’s toolbar. Then, select “Remove block” from the drop down menu or use shortcut “Shift + Alt + Z”.
3. To rearrange blocks, click and drag the block’s handle (six dots) up or down to move it to a new position within the editor window.
4. Advanced Block Features
1. Block Settings: Adjusting Alignment, Colour, and Spacing
Each block in the Gutenberg block editor comes with its own set of settings that allow users to customise its appearance and behaviour.
1. Alignment: You can adjust the alignment of blocks (e.g., left, center, right, justified) using the alignment options available in the block’s toolbar or sidebar settings.
2. Color: Some blocks, such as headings and paragraphs, may offer options to change text or background colors. Users can access these color settings from the block’s sidebar or toolbar.
3. Spacing: Gutenberg Block Editor provides options to adjust spacing between blocks or within individual blocks. Users can modify spacing settings using the block’s advanced options or with additional plugins that offer advanced layout controls.
2. Using Reusable Blocks for Efficiency
Reusable blocks allow you to save frequently used block configurations or layouts and reuse them across multiple posts and pages. To create a reusable block, design a block layout with desired content and settings, then click on the three-dot menu icon in the block’s toolbar and select “Add to Reusable Blocks.”
Once saved, reusable blocks can be inserted into new posts or pages by accessing the “Reusable” tab in the block inserter menu and selecting the desired block.
3. Customising Block Styles with CSS Classes
Gutenberg block editor allows users to apply custom CSS classes to individual blocks, giving them greater control over block styling and appearance.
4. Adding Custom Blocks with Plugins
Gutenberg’s extensibility allows developers to create custom blocks using JavaScript and register them as plugins. You can install custom block plugins from the WordPress plugin repository or third-party sources to extend Gutenberg’s capabilities and add new block types to your editor.
5. Media Integration
You can seamlessly integrate images, galleries, videos, audio files, and playlists into your WordPress posts and pages using the Gutenberg Block Editor.
1. Inserting images and galleries
To insert images into your page, click on the “+” icon to add a new block and select the “Image” block.
For galleries, choose the “Gallery” block from the block inserter and upload multiple images to create a gallery. You can customise gallery settings such as the number of columns and image
size.
2. Embedding Videos from Platforms like YouTube and Vimeo
To embed a video from YouTube or Vimeo, add a new block and select the “Embed” block. Copy the URL of the video you want to embed and paste it into the block
3. Adding Audio Files and Playlists
To add audio files or playlists to your page, add a new block and select the “Audio” block. For playlists, select the “Playlist” block and add multiple audio files to create a playlist. You can customise playlist settings such as auto-play and loop options.
6. Layout and Design
1. Working with columns and grids
To create columns, add a Columns block from the block inserter menu and specify the desired number of columns.
Once added, you can insert other blocks (e.g., text, images, buttons) into each column individually, allowing for flexible and customisable layouts. You can adjust column widths, alignments, and spacing to achieve the desired visual balance within the layout.
2. Customising Block Layouts with Block Patterns
Block patterns are predesigned layouts consisting of multiple blocks arranged in a specific order. Gutenberg Block Editor provides a variety of built-in block patterns for common layout designs, such as hero sections, feature grids, testimonials, and more.
Block patterns offer a quick and easy way to create visually appealing and structured layouts without the need for manual block arrangement.
3. Exploring Full-Site Editing Capabilities
Full-site editing represents the next phase of Gutenberg’s development, aiming to extend block-based editing beyond individual posts and pages to encompass entire website layouts.With full-site editing, you will be able to customise not only the content of their posts and pages but also the layout and design of their entire website, including headers, footers, sidebars, and more.
Full-site editing capabilities are still in development and may vary depending on the WordPress theme and plugins used. If you are interested, you can experiment with experimental features or beta releases of Gutenberg block editor to get a glimpse of the future of WordPress website customisation.
7. Collaboration and Revision
Collaboration and revision are essential aspects of content creation and management in WordPress. Here’s how you can collaborate with others and manage revisions effectively using the Gutenberg Block Editor.
1. Collaborating with Others Using the Block Editor
1. Gutenberg Block editor allows multiple users to work on a post or page simultaneously, making real-time work easier.
2. Users with appropriate permissions (e.g., editors, authors) can work together on content creation within the Gutenberg block editor.
3. Collaborators can see changes made by others in real-time, facilitating communication and coordination during the editing process. To collaborate with others, ensure that each user has the necessary permissions to access and edit the post or page in question.
2. Reviewing and Restoring Revisions
1. Gutenberg block editor automatically saves revisions of your content as you edit, allowing you to review and revert to previous versions if needed.
2. To access revisions, click on the three-dot menu icon in the top-right corner of the editor window and select “History” from the drop down menu.
3. The revisions history panel will display a timeline of saved revisions, showing the date and time of each revision and the user who made the changes.
4. You can compare different revisions, restore previous versions, or revert to a specific revision by clicking on the corresponding entry in the revisions history.
3.Using the Revisions History for Version Control
1. The revisions history in Gutenberg block editor serves as a version control system for your content, allowing you to track changes over time and maintain a record of edits.
2. You can use the revisions history to track the evolution of a post or page, identify who made specific changes, and revert to earlier versions if necessary.
3. Revisions history provides an additional layer of accountability and transparency in content management, ensuring that you can easily manage and maintain the integrity of your content over time.
8. Tips and Tricks
These are some tips and tricks for maximising your efficiency and effectiveness with the Gutenberg Block Editor.
1. Keyboard Shortcuts for Faster Editing
Gutenberg block editor offers a variety of keyboard shortcuts to streamline your editing workflow. Some useful shortcuts are as follows:
1. Ctrl + Z: Undo your last action.
2. Ctrl + Shift + Z: Redo your last undone action.
3. Ctrl + X: Cut selected content.
4. Ctrl + C: Copy selected content.
5. Ctrl + V: Paste copied content.
6. Ctrl + S: Save changes to your post or page.
7. Ctrl + Shift + D: Duplicate the selected block.
8. Shift + Alt +Z: to delete the block.
There more keyboard shortcuts, to learn more about them visit WordPress keyboard shortcuts.
2.Utilising the Block Editor in Together with Themes and Plugins
Gutenberg block editor is designed to work seamlessly with WordPress themes and plugins, allowing you to enhance your editing experience and extend the functionality of the editor. Choose a WordPress theme that is optimised for Gutenberg to ensure compatibility and maximise the editor’s capabilities.
Explore Gutenberg-compatible plugins that offer additional blocks, block patterns, and advanced editing features to enhance your content creation workflow.Some popular Gutenberg block editor plugins include CoBlocks, Stackable and Kadence Blocks.
3. Best Practices for Optimising Performance and SEO
1. Optimize your images: Before uploading images to your WordPress site, resize and compress them to reduce file size and improve page load times. Use descriptive filenames and alt tags for images to enhance accessibility and SEO.
2. Use headings hierarchy: Structure your content using proper heading tags (H1, H2, H3, etc.) to improve readability and SEO. Avoid skipping heading levels and use keywords appropriately.
3. Optimise meta data: Craft compelling meta titles and descriptions for your posts and pages, incorporating relevant keywords to improve search engine visibility.
4. Ensure mobile responsiveness: Choose a responsive WordPress theme and test your content across different devices to ensure optimal viewing experience for mobile users.
Conclusion
The Gutenberg Block Editor is a powerful tool that helps you to create rich and dynamic post and pages with ease. Mastering its features and functionalities, you can take your website to the next level, captivating your audience with visually stunning and engaging posts and pages. You’re now well-equipped to harness the full potential of the WordPress Block Editor.
Interesting Reads:
Easy Ways to Identify WordPress Themes