
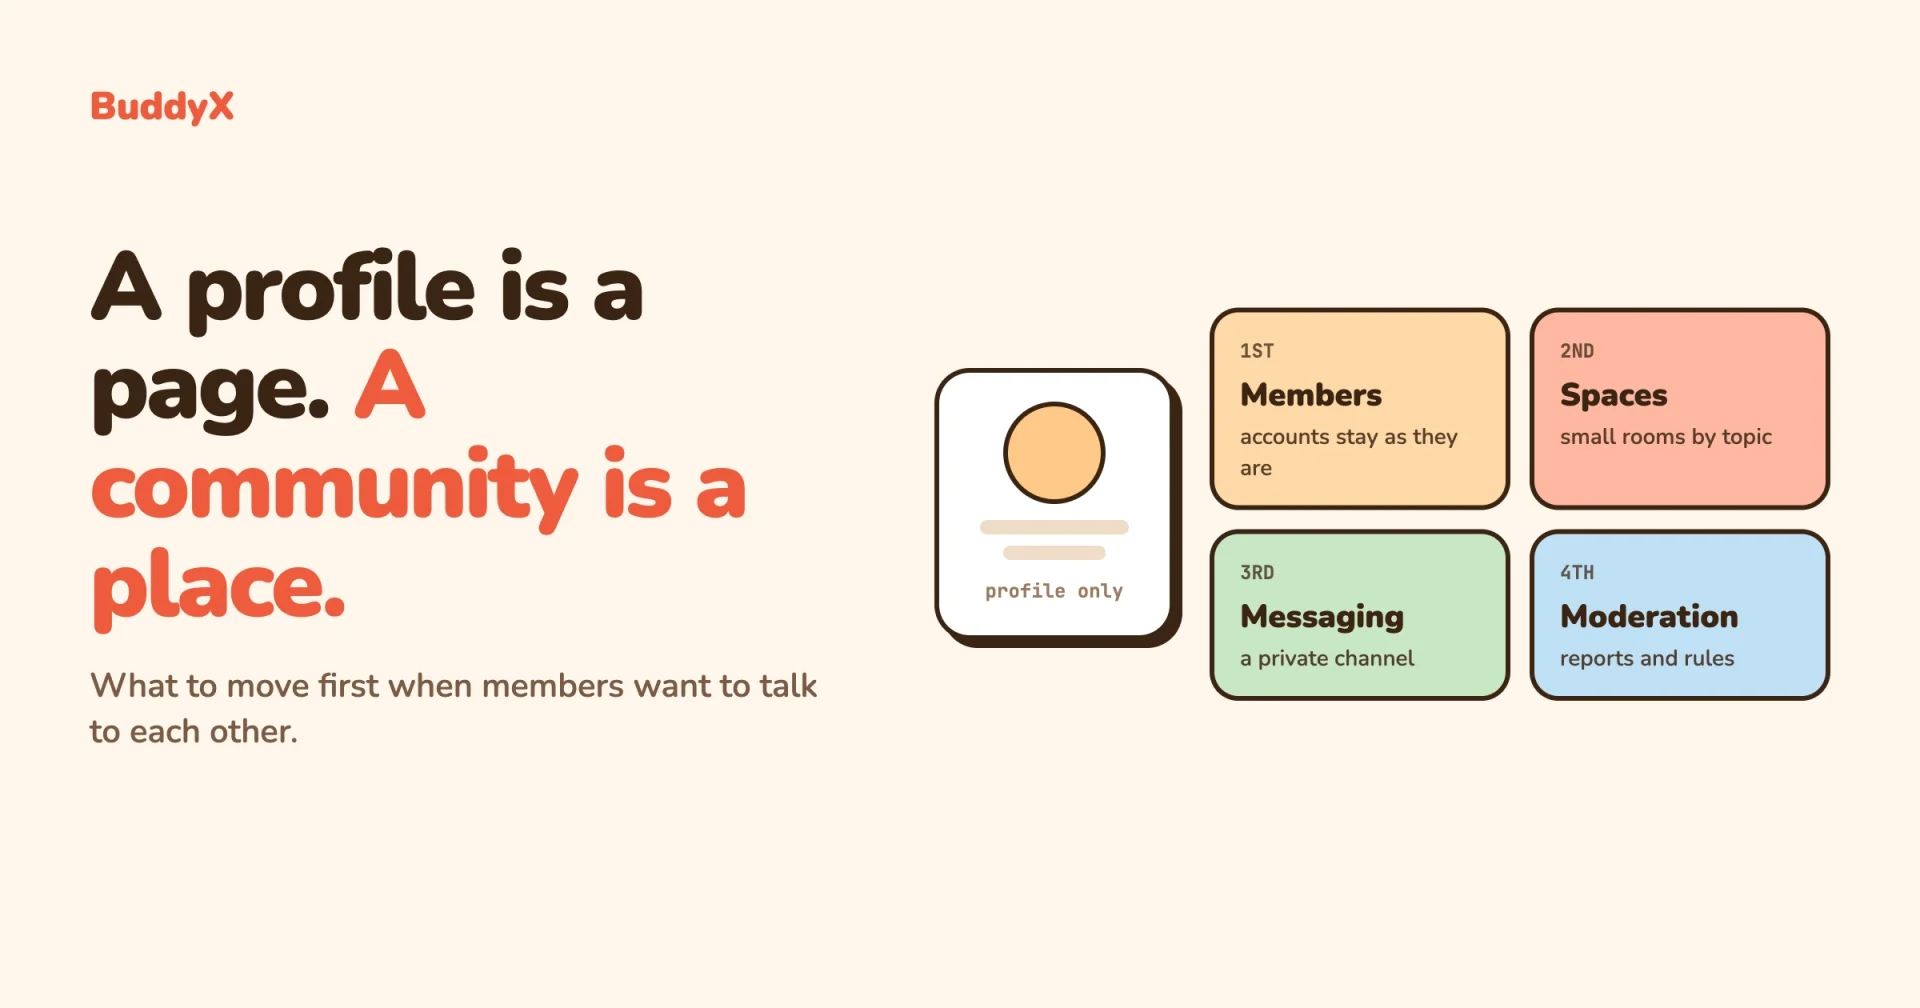
A member-profile plugin gives each person a page. A community needs places where members meet: a feed, spaces for topics, private messages and moderation tools. You can add those places without throwing away your members, because your WordPress accounts stay as they are. The order we suggest is members and their profile fields first, then spaces, then messaging, then moderation rules, and billing stays where it already lives.
This guide is for a site owner who already runs a profile, registration or membership-directory plugin and now wants members to talk to each other. We use plain words, and we explain each technical term the first time it appears. We build on BuddyX (our free community theme) and BuddyNext (our free community engine), and every BuddyNext claim below comes from the plugin’s own readme and documentation, read on 8 October 2026.
In this guide
- How to tell you have outgrown a profile plugin
- What a profile plugin does well, and what it does not try to do
- What a community engine adds
- What to do when the login or membership plugin takes the whole site down after an update
- What to move first, in order, and what to leave alone
- A setup walkthrough with BuddyX and BuddyNext
- How to try it before you commit
- Questions people ask
How do you tell you have outgrown a member-profile plugin?
You have outgrown it when your members ask for things the plugin was never built to give them. A profile plugin answers the question “who is this person?”. A community answers a different question: “what is going on here, and who can we talk to about it?”. If your members are asking the second question, the plugin is not broken. It is just the wrong tool for the new job.
Here are the signs, in the words site owners and members tend to use:
- “Where can members see what is new?” Members log in, look at their own profile, and find nothing happening. There is no single page that shows what other members posted today.
- “How can members talk to just their own group?” Members want a smaller room for one topic, one city or one course. A directory of everyone is too wide.
- “Can members message each other without sharing email addresses?” Members swap email addresses in comments because the site has no private channel.
- “Someone is being rude and there is no way to report it.” You have no report button and no queue where you review complaints. You find out about problems by email, days late.
- “We have a member list, but nobody uses it.” The directory gets visits, yet members leave without connecting with anyone.
- “Every plugin update makes us nervous.” You have stacked add-ons on top of the profile plugin to fake community features, and each update is a risk.
How to check
Open your site as a regular member, not as an administrator. Spend five minutes trying to do what a new member would want: find someone with a shared interest, say hello, join a small group, report a rude post. Write down every step where you hit a dead end. If three or more of those tasks cannot be done at all, you are looking at a gap in features, not a settings problem.
What to do about it
Do not start by deleting anything. Your members and their accounts are the valuable part. The plan below adds community features beside what you have.
What does a profile plugin do well, and what does it not try to do?
A profile plugin does a narrow job well: it gives every member a public page, a registration form, a login form, and often a member list you can search. That is a real need. Many sites run well on exactly that for years. We name Ultimate Member here only as one example of this kind of plugin, and we say nothing against it. It does what it sets out to do.
Here is a fair, generic picture of what this kind of plugin covers:
- Profiles. A page per member with a photo and some fields such as a bio, a location or a job title.
- Registration and login. A branded sign-up form and a login form, so people do not see the default WordPress screens.
- A directory. A page listing members, usually with search and filters.
What it does not try to do is run conversations. A feed where members post and react, small rooms for one topic, private one-to-one messages and a review queue for reports are a different product category. You can bolt separate plugins on for each, but then you manage four plugins with four settings screens, four update schedules and four chances for something to clash. That is the “every update makes me nervous” feeling from the list above.
The honest summary: if your site is a members-only directory or a simple membership site, and members do not need to talk to each other, a profile plugin is enough. Keep it. This guide is for the site that wants the conversation as well.
What does a community engine add?
A community engine adds the places where members meet. BuddyNext is the free engine we build, and its own readme describes it as “the social layer for WordPress” with activity feeds, spaces, member profiles, messaging and moderation in one platform. Here is what that means feature by feature, using only what the plugin’s readme and documentation state.
An activity feed
The feed is the page that answers “what is new?”. Members post, and other members react and comment. The readme lists a rich post composer, reactions, comments, hashtags, polls, shares and bookmarks. The documentation adds that the feed has several views (For You, Following, Spaces and Network) and that posts carry per-post privacy settings.
Spaces
BuddyNext calls small rooms for one topic “spaces”. The readme describes spaces with membership, roles and per-space content, and the documentation says they can be public, private or hidden, with join requests, sub-spaces and shareable invite links. Think of a space as a room with its own feed, members and moderators, such as a local meetup, a course cohort or a support group.
Member profiles and a directory
This part will feel familiar. BuddyNext has member profiles, a searchable member directory and a search across the community. Profile fields are grouped into sections, and each field has a visibility setting, so a member can show some details to everyone and keep others for followers only. You can also set up member types, such as student or mentor, and filter the directory by them.
Connections and follows
Members can follow each other and connect. A follow means “show me this person’s posts”. A connection is a two-way link. Members can also block or mute, which the documentation lists under the social graph.
Direct messaging
Members can message each other privately, one to one or in groups. One detail matters for planning: the readme says direct messaging and media are powered by WPMediaVerse, a companion plugin, and its FAQ states that BuddyNext gates those surfaces until that plugin is active. So messaging is a two-plugin job. The documentation says the free version of WPMediaVerse is enough to start.
Moderation
The readme describes reactive moderation: members post freely, and reports go to a review queue where you act on them. The documentation adds strikes, suspensions, an appeals flow, a front-end Community Admin page so moderators do not need a WordPress admin account, and word, link and IP block lists. Every action is recorded in an audit log.
Everything else in the free plugin
The readme also lists notifications and branded emails, member onboarding, invites, social login, and optional two-factor sign-in. It calls the plugin “REST-first”, meaning the data is available through an application programming interface (API), the standard way one piece of software talks to another.
What needs another plugin or the paid version
To keep expectations honest: messaging needs WPMediaVerse, as above. Memberships with on-site checkout, advanced moderation, email automation and analytics belong to BuddyNext Pro, according to the readme. The free plugin does not take payments.
What if the login or membership plugin takes the whole site down after an update?
If a plugin update breaks your site, WordPress has a built-in way to get you back in, and there are two manual backups if that fails. This section is general advice for any login, registration or membership plugin. It names no specific bug or version, because the steps are the same whichever plugin is at fault.
Why we cover it here: the plugins that handle your “front door” (login, registration, membership checks) load on every request. If one of them fails, you can be locked out of the same admin area you would use to fix it. Anyone planning to add community features should know the way back in before touching anything.
Symptom
You update a plugin, and then the site shows a message such as “There has been a critical error on this website”, a blank white page, or a login that loops back to itself. You cannot reach the dashboard to switch the plugin off.
Step 1: check your email for the recovery link
WordPress has a feature called Recovery Mode, added in version 5.2. According to the official WordPress Recovery Mode documentation, when WordPress detects a fatal PHP error during a regular page load, it shows visitors the technical-difficulties message and sends an email to the administrator’s email address, with a link to log in with recovery mode active.
In recovery mode, the documentation says, the faulty plugin or theme is paused just for your admin session, so you can log in safely. Your dashboard shows notices pointing to the part that failed. Go to Plugins (or Appearance, then Themes) and deactivate the problem item. Once fixed, use the “Exit Recovery Mode” option, usually in the admin toolbar, and check that the site works.
How to check it worked: load your home page in a private browser window. If it loads, the site is back.
One caution from the same page: the email goes to the administrator address, so check that mailbox, including the spam folder. The documentation also says that if the failure happens before your mail plugin loads, the email is sent straight from the web server, and it may be filtered or blocked.
Step 2: if no email arrives, deactivate the plugin with WP-CLI
WP-CLI is the command-line tool for WordPress. Many hosts include it, and you run it in a terminal (a text window where you type commands) on the server. If you are not comfortable with that, ask your host’s support to run the command for you. The official wp plugin deactivate documentation shows this example, which deactivates one plugin by its folder name:
wp plugin deactivate plugin-folder-nameThe same page lists two global flags: --skip-plugins (“skip loading all plugins, or a comma-separated list of plugins”) and --skip-themes (the same for themes). If the broken plugin crashes WP-CLI itself, you can tell WP-CLI not to load it while it switches it off:
wp plugin deactivate plugin-folder-name --skip-plugins=plugin-folder-nameIf the theme is the suspect, add --skip-themes. Replace plugin-folder-name with the real folder name, which you can see under wp-content/plugins or by running wp plugin list.
How to check it worked: the command prints a line saying the plugin was deactivated. Then reload the site.
Step 3: rename the plugin folder
If neither of those works, you can use FTP (a way of browsing the files on your server) or your host’s file manager. The same official Recovery Mode page says you may temporarily deactivate a plugin by renaming its folder, and its example renames /wp-content/plugins/hello-dolly to wp-content/plugins/hello-dolly-1/. WordPress can no longer find the plugin at its usual path, so it stays off.
The WordPress troubleshooting FAQ describes a wider version: rename the whole plugins folder (for example to plugins.hold) to disable every plugin, log in, then rename it back. It says the plugins then stay deactivated, and you reactivate them one at a time. Use that one only if you cannot tell which plugin is at fault.
How to prevent it: update the front door on a copy first
This habit is our own advice, not a WordPress rule, and it is the cheapest protection there is. Before you update any plugin that controls login, registration or membership:
- Make a full backup of the files and the database.
- Update the plugin on a staging copy of your site first. A staging copy is a private duplicate where mistakes do not reach your members. Many hosts create one with a single click.
- On the copy, log in as a normal member, register a test account, and log out and in again.
- Only then update the live site, ideally at a quiet hour.
- Keep your administrator email address current, so a recovery link would reach you.
A related warning for communities: a site that runs out of memory can look like a plugin crash. If you see “Allowed memory size exhausted”, read the tweakswp.com post Allowed Memory Size Exhausted: Where a WordPress Request’s Memory Goes. BuddyNext’s readme recommends a PHP memory limit of at least 512 MB when the full plugin family is active, and notes that the 128 MB default can be exhausted. Our hosting post covers the rest: Community Site Hosting Guide: What BuddyNext Really Needs.
What should you move first, and in what order?
Move members first, then spaces, then messaging, then moderation rules. Each step is small, and you can stop after any of them. Billing stays where it is.
1. Members and their profile fields
Start with the people, because everything else depends on them. The good news in BuddyNext’s own migration documentation is that your WordPress member accounts stay exactly as they are: the same username, email, password and role, so nobody has to register again. Your posts, pages and media library are untouched as well.
What does not move by itself is the extra profile data stored by your current profile plugin. BuddyNext keeps its own profile fields. The documentation describes an importer for communities built on the older option, which our guide Migrating From BuddyPress to a Modern Community Stack: What Changes covers in full, and we do not repeat that here. For a profile plugin, we found no importer in the BuddyNext documentation, so plan on one of two routes: ask members to fill in the new profile once (the onboarding wizard guides new members through their profile, spaces and people), or ask a developer to copy values across. Do not promise members an automatic transfer.
How to check: after switching on BuddyNext on a staging copy, open the Members directory and confirm that your existing users are listed with their roles.
Prevent surprises: decide which profile fields you truly use. A short, useful list beats a long one.
2. Spaces
Next, create the rooms. Look at how your members already group themselves: by topic, place, course or membership level. Turn the three or four biggest groupings into spaces and leave the rest for members to ask for. The setup wizard pre-fills starter space categories (General, Announcements, Help and Support, Off-topic), which you can edit.
How to check: join a space with a test account and post in it. Confirm that a second test account can see the post if the space is public, and cannot if it is private.
Prevent empty rooms: a space with no one in it looks dead. Put your most active members into the first spaces yourself, and use the invite links the documentation describes to bring people in.
3. Messaging
Switch on messaging third, because it needs the extra WPMediaVerse plugin and because private messages raise your moderation duties. Install it from BuddyNext’s Add-ons screen when you are ready. Before you open it to everyone, decide who can message whom, and tell members how to report a message that bothers them.
How to check: send a message between two test accounts and confirm both inboxes show it.
4. Moderation rules
Set your rules before the community grows, not after the first fight. Choose how new members join (open, invite only or admin approval, all wizard options), decide who your moderators are, and add any banned words or link domains. Write your community rules in plain language.
How to check: report a test post from a second account and confirm it appears in the review queue.
What to leave where it is: billing
If members pay for access today, leave the payments with the membership or store plugin you already use. It already holds your payment records and your members’ billing relationship, and moving money is the riskiest part of any migration. Here is the scope line, stated plainly: BuddyNext controls access to the community, and it does not lock your ordinary posts or pages. A paid-access setup needs a membership or store plugin for the billing side.
The documentation gives you two ways to connect them. First, BuddyNext has a “Private community” switch that sends logged-out visitors to the login page for every BuddyNext page. Second, the developer documentation describes a filter that lets a membership plugin decide who passes that gate, for example only members with an active plan. The paid BuddyNext Pro also lists membership plans with checkout, and bridges for WooCommerce and Paid Memberships Pro. If you want your current membership plugin to stay in charge, that is a job for a developer who reads that page, and we mention it so you can ask the right question.
How do you set up BuddyX with BuddyNext?
You install the theme, install the plugin, run the setup wizard, and check the result as a member. Do all of this on a staging copy first. The steps below follow BuddyNext’s own installation and wizard documentation.
Before you start
- BuddyNext’s documentation lists WordPress 6.9 or newer, PHP 8.1 or newer, and a PHP memory limit of 512 MB recommended.
- Your permalinks must be set to anything other than “Plain”. If yours are Plain, BuddyNext shows a notice with a one-click button that switches them to “Post name”.
- Take a backup, and work on the staging copy.
Step 1: install the BuddyX theme
- In WordPress admin, go to Appearance, then Themes.
- Click Add New Theme, search for BuddyX, then Install and Activate.
BuddyNext’s documentation recommends BuddyX as the starting point because it is free and built for community sites. It also says BuddyNext works with any WordPress theme, so you can change your mind later, and your members, spaces and settings stay put. The theme controls the frame (header, footer, base fonts and colors), and BuddyNext draws the community screens itself. The BuddyX site adds that BuddyX Pro includes a small BuddyNext compatibility layer, and that BuddyNext follows the colors you set in the Customizer under Skin Colors.
Step 2: install BuddyNext
- Go to Plugins, then Add New, and install BuddyNext (or upload the zip).
- Click Activate. According to the documentation, BuddyNext creates the community pages (Activity, Members, Spaces, Notifications and Login) for you, and the free plugin needs no license key.
If a community link shows “not found” right after install, go to Settings, then Permalinks, and click Save Changes once. The documentation lists that as the fix.
Step 3: run the setup wizard
The wizard opens on first visit. It is seven steps: Branding, Registration, Profile Fields, Spaces, Pages, Addons and Done. You can skip any step or save and exit. Choose these settings with care:
- Registration. Open, invite only or admin approval. If you pick invite only or admin approval and want walk-in sign-ups fully closed, also turn off WordPress’s own “Anyone can register” option under Settings, then General, as the documentation advises.
- Private community. A separate switch for who can view the community. It is off by default. Turn it on if your members-only site should hide the community from visitors.
- Addons. Nothing is pre-ticked. Tick WPMediaVerse here when you reach the messaging step of your plan, not before.
- Done. If the community is empty, an optional button adds sample members, spaces and posts, which you can remove later from the Tools area. Use it on the staging copy only.
Step 4: test as a member
Log out, register a new test account, finish onboarding, join a space, write a post, follow another account and report a post.
Step 5: go live
Repeat the same steps on the live site, or move the tested staging copy if your host supports it. Tell members what is new and that their login has not changed.
Can you try it before you commit?
Yes, in two ways. The first is a staging copy of your own site, which is the safest because it uses your real members and settings. Create one with your host’s staging tool, install BuddyX and BuddyNext there, and test the full path from the previous section. Nothing you do on the copy reaches your live members.
The second is the demo. The BuddyNext site at buddynext.com/demo offers a free sandbox. As the page describes it, you get a private BuddyNext site seeded with members, spaces and posts, with full admin access, and it is deleted after four hours. It needs only an email address. It cannot be extended or made permanent, so use it to explore and then install the free plugin on your own staging site for anything lasting.
Use the demo to judge the feed, the spaces and the moderation screens. Use staging to answer the question the demo cannot: how does it behave with your data?
Questions people ask
Does the profile plugin have to be deleted?
No. Your member accounts belong to WordPress, not to the profile plugin. You can run both for a while, and retire the old one once you are satisfied. If it handles billing or access, keep it and let it keep doing that job.
Will members have to register again?
No. BuddyNext’s documentation says existing WordPress accounts keep the same username, email, password and role. Members will only have to re-enter extra profile details that your old plugin stored in its own fields, since we found no importer for those.
Does BuddyNext protect posts and pages?
No. It controls access to the community. Its private-community switch covers BuddyNext’s own pages, and it does not lock ordinary posts or pages. Paid access and billing belong to a membership or store plugin.
Is BuddyX required to use BuddyNext?
No. BuddyNext’s documentation says it works with any WordPress theme. BuddyX is the free theme it recommends and is built for community sites, and the theme only changes the frame around the community.
Does private messaging come with the plugin?
Not on its own. The messaging screens are part of BuddyNext, but the engine behind them is the WPMediaVerse companion plugin, and the messages tab stays hidden until it is active.
What if an update locks you out of your own site?
First look for the Recovery Mode email at your administrator address. If it does not come, deactivate the plugin with WP-CLI or rename its folder, as described above. Keep a backup, and test updates to login and membership plugins on a staging copy first. This is general guidance, not legal or technical advice for your particular host.
If you want to see how the theme side of this fits together, the BuddyX theme features page shows what the free theme offers and how BuddyNext sits inside it. Start on a staging copy, take it one step at a time in the order above, and your members will have somewhere to meet without losing the accounts they already have. For a wider look at the platform itself, read BuddyNext Features: The Complete Community Platform Guide.